

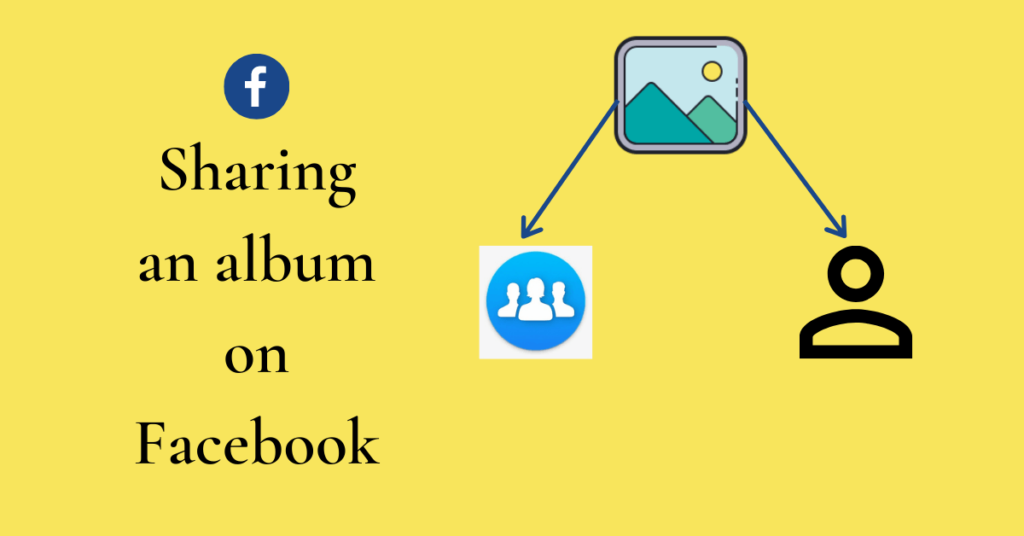
Ever since the pandemic era started, so many of us haven’t been able to meet up with friends and family. This means no more fresh set of vacation pictures, no parties to attend, and no family functions to enjoy at. In times like these, all we can look forward to is reminiscing the good old memories by sharing photos and albums of those times with our loved ones. This is where Facebook rises to the occasion. Facebook makes it very convenient to share an album on its platform through a few simple steps.
We shall be discussing these steps through this article.
Sharing an Album on Facebook through a Web Browser
- Log in to your Facebook account.
- Click on your profile from the menu on the left of the home page.
- Click on the “Photos” tab.
- Go to the category “Albums”.
- Click on the album that you want to share.
- Tap on Share under the name of the album.
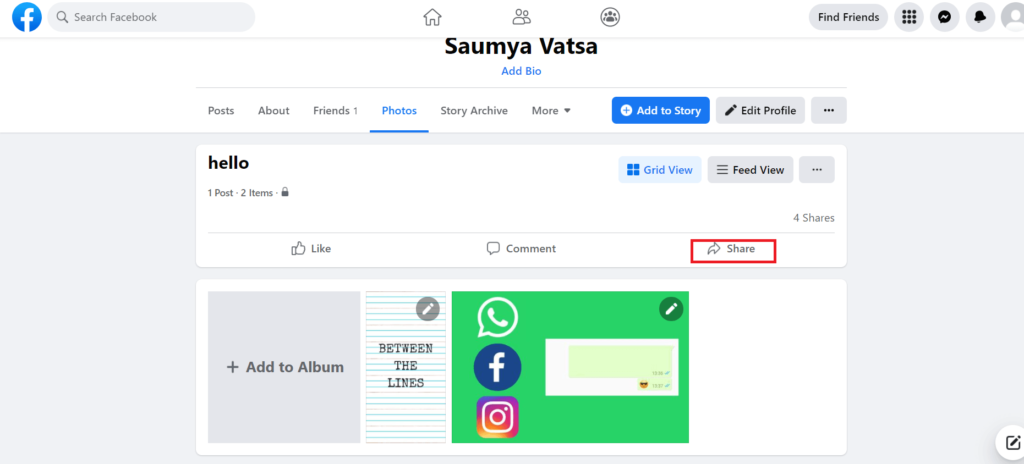
- These are the options that you can find in the drop-down menu:
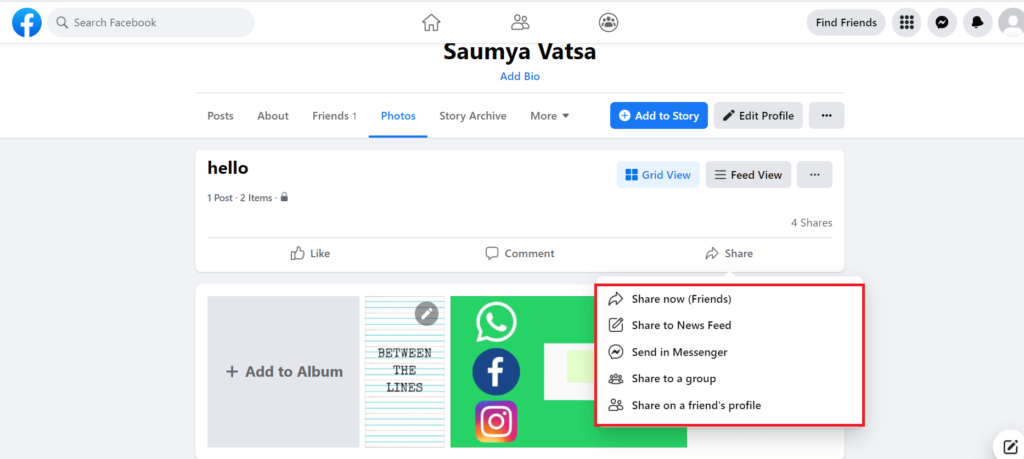


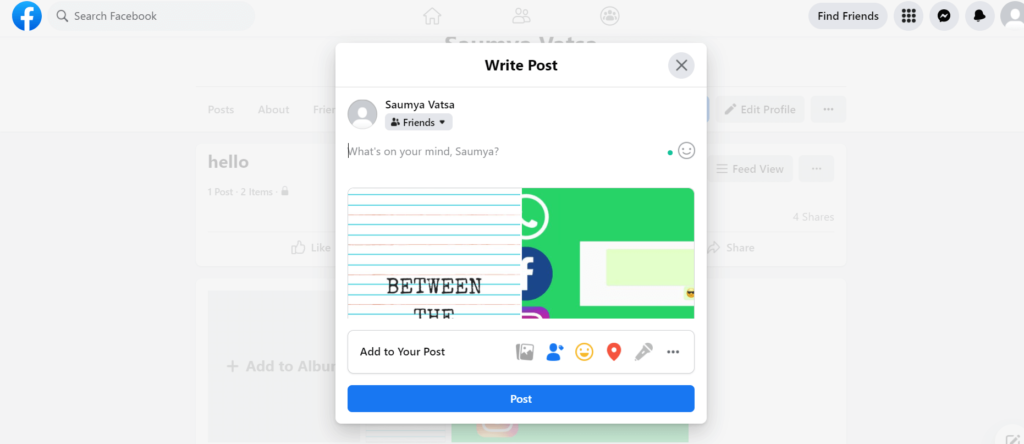
- Share now (Friends): Click on this option to share the album on your profile. This way the album will appear on the newsfeed of your Facebook friends if the audience for the shared album is set as “Friends” or “Public”.
- Share to News Feed: Click on this option to share the album on your newsfeed as a post. Your friends can only see the shared album on their newsfeed if the audience is set as “Friends” or “Public”.

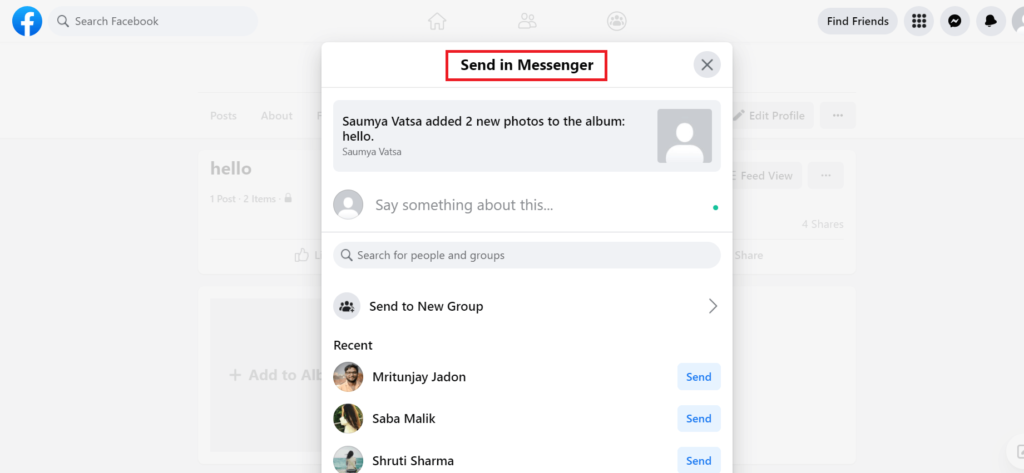
- Send In Messenger: Click on this option to share the album through personal messages with particular friends via Facebook Messenger. Your friends can view the album shared through the message only if the audience is set as “Friends” or “Public”.

- Share to a Group: Click on this option to share the album with particular groups of your choice. People in the group can view the shared album only if the audience is set as “Public”.
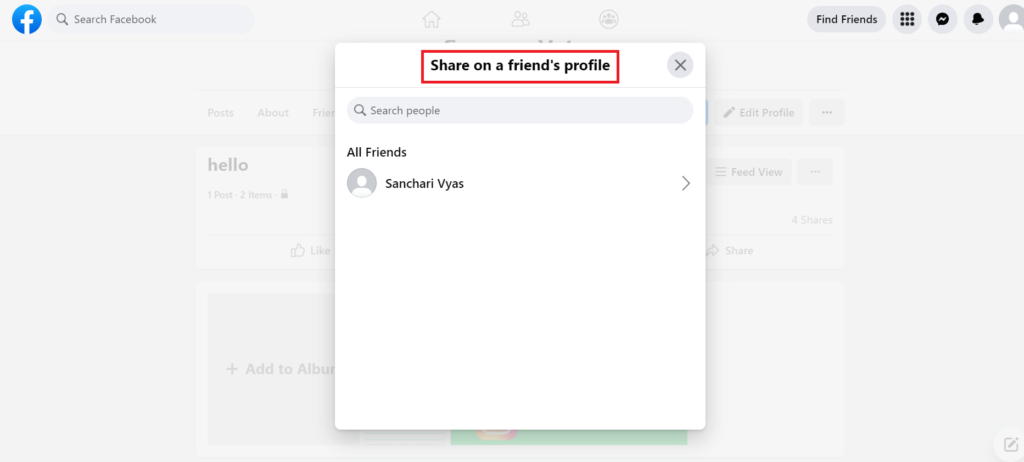
- Share on a Friend’s profile: Click on this option to share the album on a particular friend’s profile. The album shall appear on their profile and they shall be notified of it. If the audience of the shared album is set as “Public”, friends of the friend can also view the album.

NOTE: Any of the aforementioned methods do not guarantee successful sharing of the album with all the intended friends or people if audience settings like “Friends except…”, “Specific friends”, or “Custom” have excluded them.
Sharing an Album on Facebook using the Facebook App
- Log in to your Facebook account.
- Tap on the three horizontal bars on the top right (for Android) and the bottom right (for iPhone) of Facebook.
- Tap on your name.
- Click on the Photos tab.
- Select the photo category “Albums”.

- Click on the album that you want to share.
- Click on the “list view” icon.
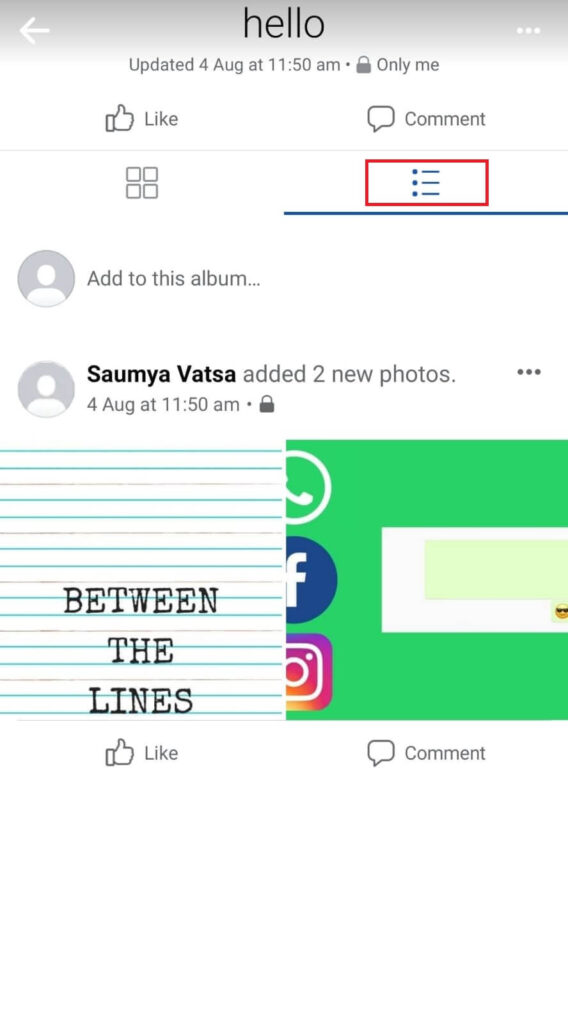
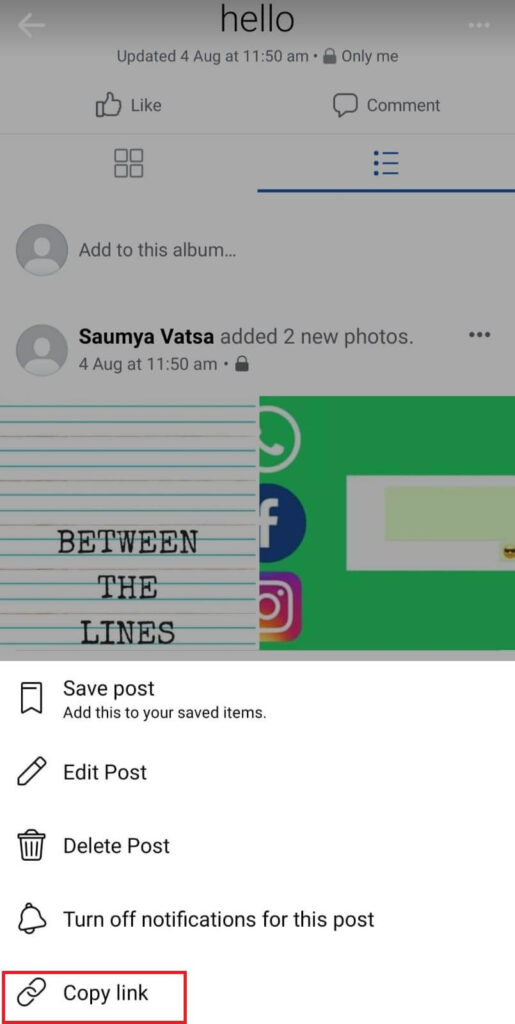
- Tap on the three vertical dots on the right side of your name.
- Select the “Copy link” option from the menu.
- Share the link via personal message, posts, status updates, stories, etc. with friends and family of your choice.


NOTE: Only the following people can view your album after opening the link.
- Must have a Facebook account AND should be friends with you on Facebook. (if “Friends” is the audience setting selected for the album)
- Must have a Facebook account. (if “Public” is the audience setting selected for the album)
Read more on Facebook:
- Steps to turn off location on Facebook.
- How to make your photos private on Facebook.
- Steps to turn off commenting on Facebook posts.
Conclusion
Sharing sweet memories through albums on Facebook can leave even sweeter smiles on the faces of our friends and families.
So, what are you waiting for? Go share that album of the party you had with your friends last year. The aforementioned steps will definitely help you do so.
If you found the article helpful, share it with your friends and encourage them to spread cheer by sharing an album they cherish on Facebook.