- Make single photo private on Facebook
- Make an album private on Facebook
Social media has made it so much easier and convenient to share beautiful memories with our friends and family. With just a few clicks, we can bring a smile to our parents’ and friends’ faces by uploading childhood pictures, vacation photos, and much more on Facebook. However, this also brings up the privacy concern. We might not be comfortable sharing certain photos with everyone publicly or even our friends. This is where making our photos private on Facebook can help.
We shall discuss the various methods by which photos can be made private on Facebook.
Making Single Photo Private on Facebook on Desktop
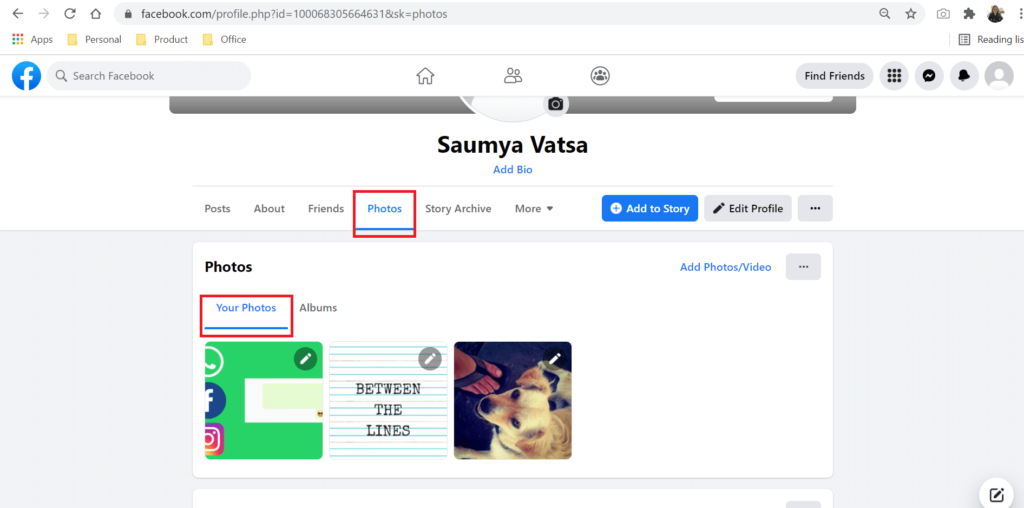
- Log in to your Facebook profile.
- Click on your profile on the left side of the Facebook page.
- Click on the Photos tab.
- Select the photo category, for eg. , Your Photos, Photos of You, Albums.
- Click on the photo that you want to make private.
- Locate the privacy button under your name on the right side of the photo.
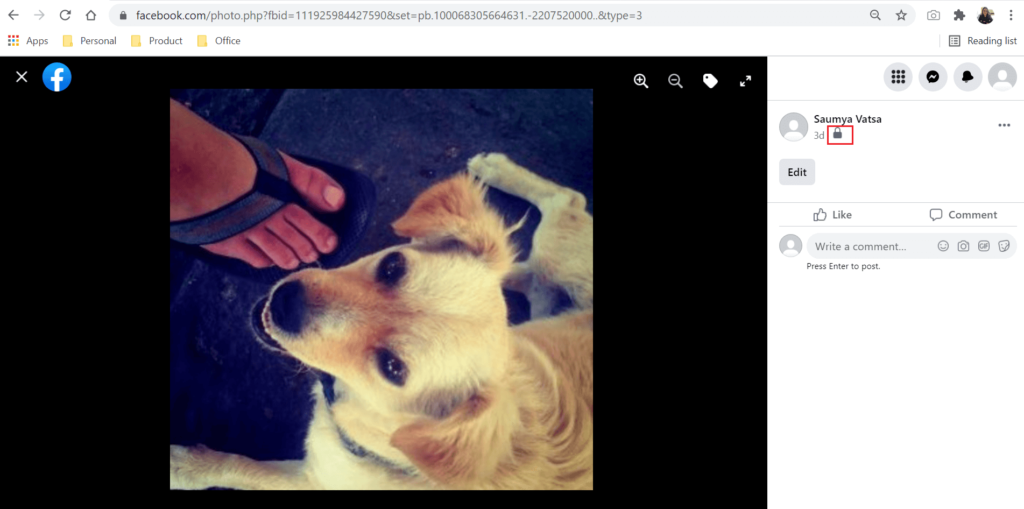
- Click on the button.
- Select the “Only Me” option from the drop-down menu.

Making an Album Private on Facebook on Desktop
- Log in to your Facebook profile.
- Click on your profile on the left side of the Facebook page.
- Click on the Photos tab.
- Select the photo category “Albums”.
- Locate the album that you want to make private.
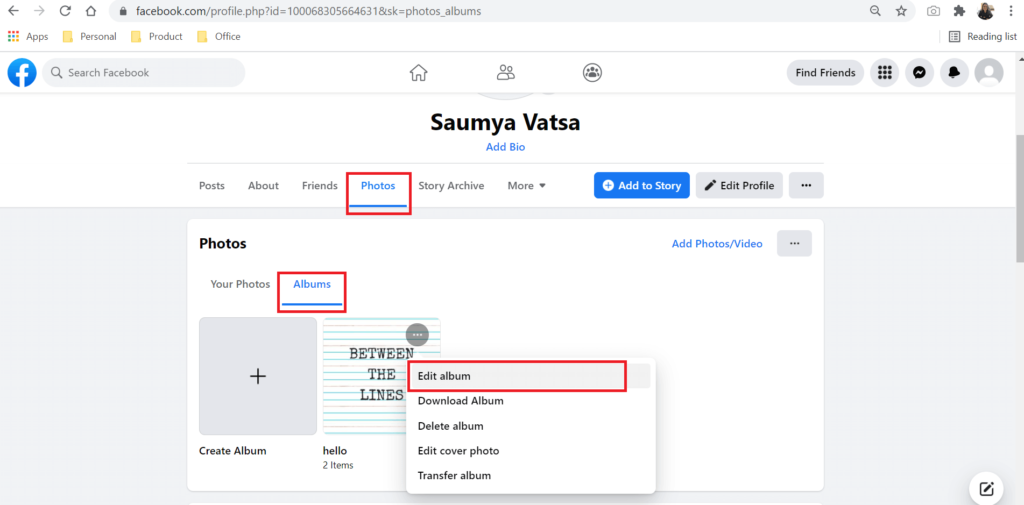
- Click on the three dots at the top right of the album cover.
- Select Edit Album.
- Locate the privacy button under “Edit Album” on the left.

- Tap on the button.
- Select the “Only Me” option from the drop-down menu.

Making Single Photo Private on the Facebook App
- Log in to your Facebook profile.
- Tap on the three horizontal bars on the top right (for Android) and the bottom right (for iPhone) of Facebook.
- Tap on your name.
- Click on the Photos tab.
- Select the photo category, for eg. , Your Photos, Photos of You, Albums.
- Click on the photo that you want to make private.
- Tap on the three vertical dots on the top right of the post.
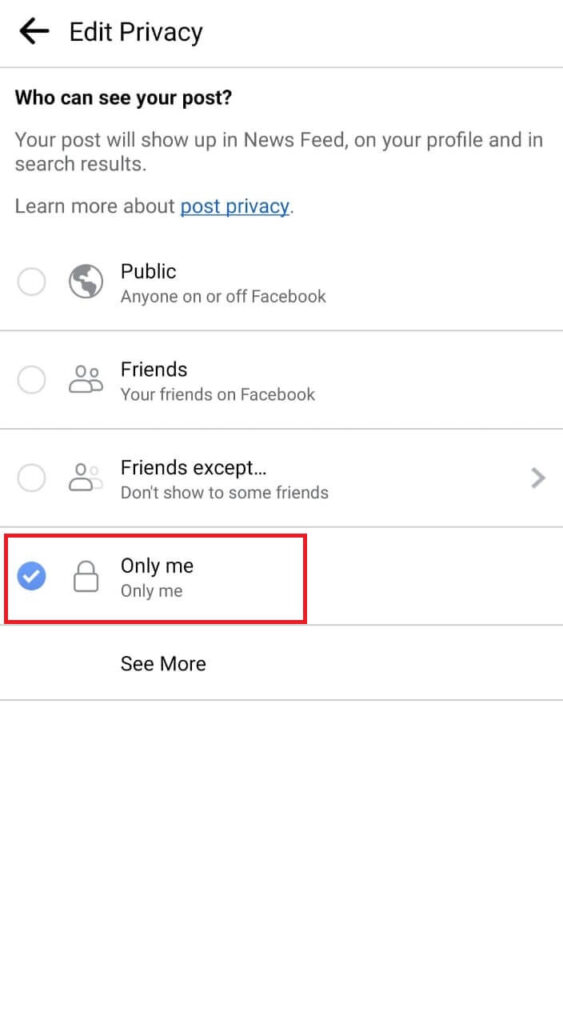
- Click on Edit post privacy.
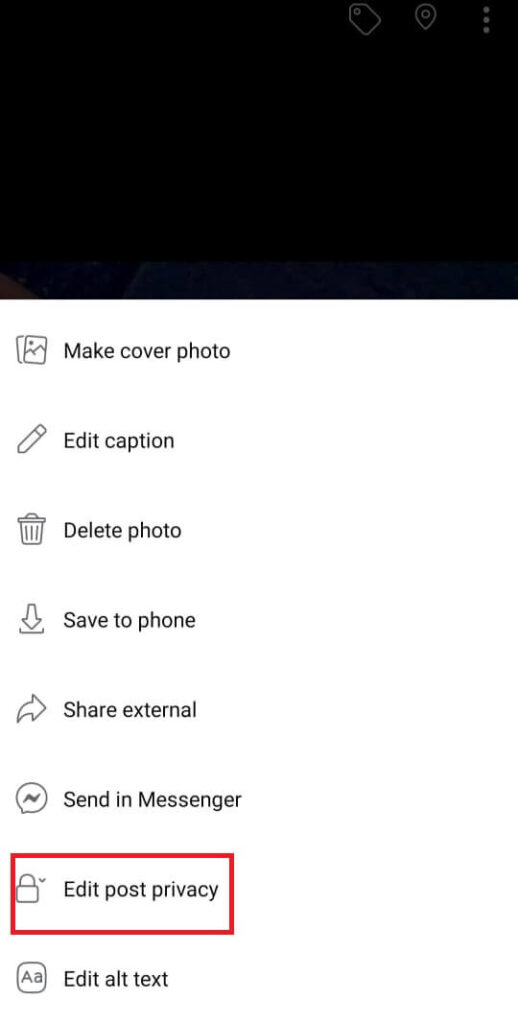
- Select the “Only Me” option from the menu.
Making Album Private on Facebook App
- Log in to your Facebook profile.
- Tap on the three horizontal bars on the top right (for Android) and the bottom right (for iPhone) of Facebook.
- Tap on your Name.
- Click on the Photos tab.
- Select the photo category “Albums”.
- Click on the album that you want to make private.
- Tap on the three vertical dots on the top right of the album.

- Click on Edit.
- Click on the privacy selector.
- Select “Only me” under Edit Privacy.
- Click on the back button on the top left.
- Click on Done.
Making Single Photo Private on Mobile Browser
- Log in to your Facebook profile.
- Tap on the three horizontal bars on the top right of Facebook.
- Tap on your Name.
- Click on the Photos tab.
- Select the photo category, for eg. , Uploads, Mobile Uploads, Albums.
- Click on the photo that you want to make private.
- Click on More Options under the photo.
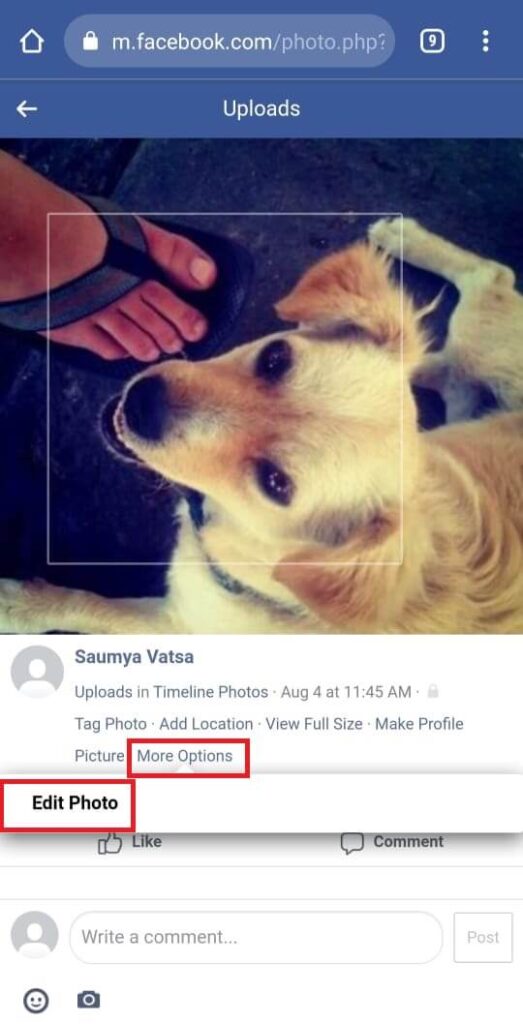
- Tap on Edit Photo.
- Click on Edit Post Privacy.
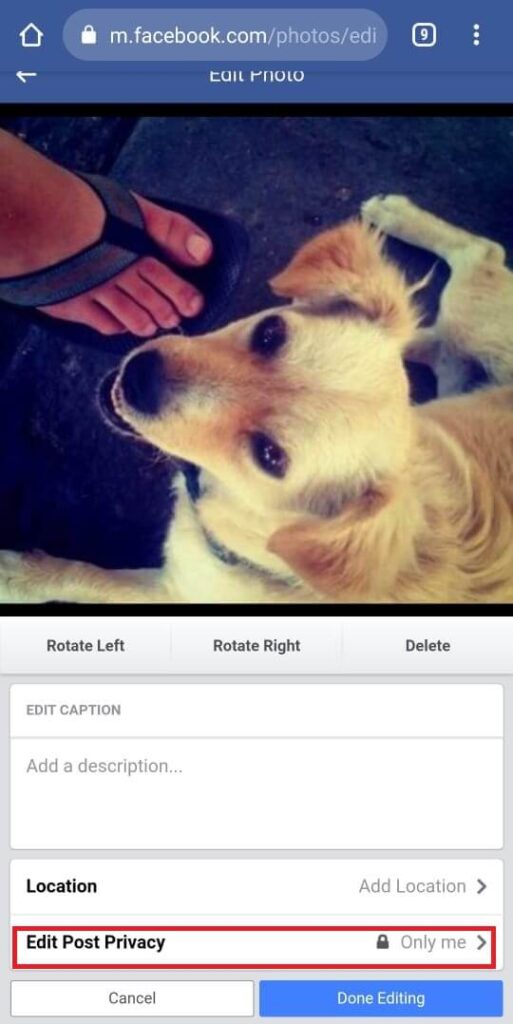
- Select “Only me” under Privacy.
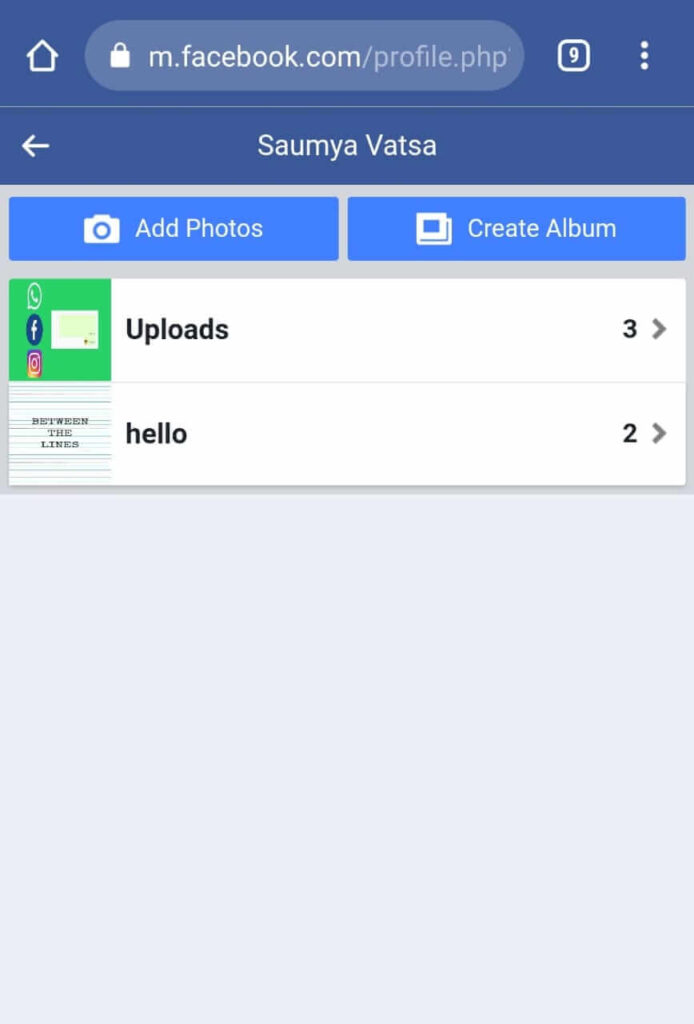
Making Album Private on Mobile Browser
- Log in to your Facebook profile.
- Tap on the three horizontal bars on the top right of Facebook.
- Tap on your Name.
- Click on the Photos tab.
- Select the photo category “Albums”.
- Click on the album that you want to make private.
- Tap on the three vertical dots on the top right of the album.
- Click on Edit.
- Click on Audience.
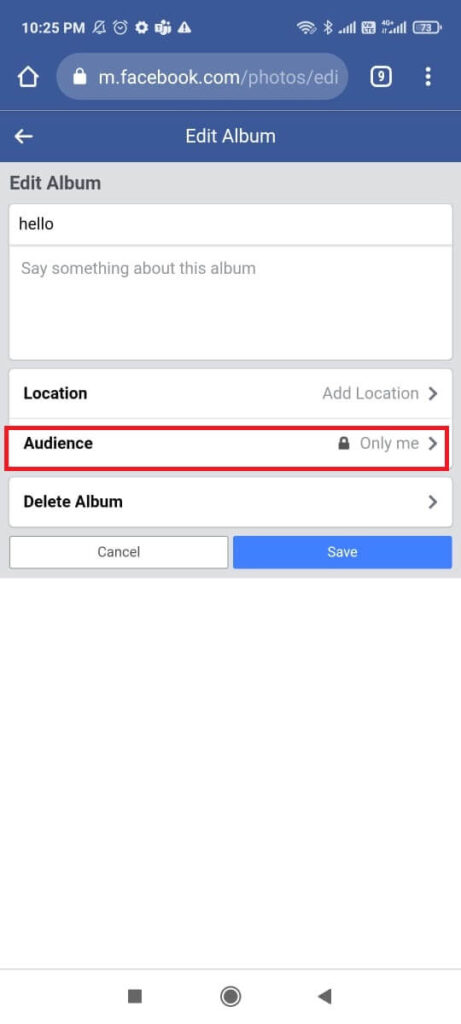
- Select “Only me” under Edit Privacy.
- Click on Save.
Read More on Facebook:
- How to Save Videos from Facebook (PC, Android & iOS)
- How to Stop WhatsApp from Sharing your Data with Facebook
- 3 Awesome Facebook Status Tips and Tricks – You Might Not Know
- How To know If Someone Has Blocked You on Facebook
Conclusion
Now you don’t have to worry about your friends stalking your Facebook profile and finding embarrassing photos from your school days. With these steps, you can easily make those photos private on Facebook.
Found this article useful? Don’t forget to share it with your friends.