
Everyone wants to hide their secret files and documents. And this is a known fact that nobody likes the way you look at their private things. How cool is that you can Hide File Behind Image. The hiding file behind an image is called Steganography.
Undoubtedly, we all have some private data which we must keep away from the reach of other peoples. And there comes a time when you want to hide any private file and folders.
Basically, Steganography is a technique that is used to exchange data over the internet without using any encryption or decryption method. It is more protective than any other method(become invisible). If nobody will see a file then how they will indulge to use it?
…and you know what is meant by secret files:)
Let me tell you how this trick works.
Hide File Behind Image Using CMD
Let’s see how to do this. Follow the steps below very carefully.
Requirements:
- WinRAR, click here to download.
- CMD, which almost all Windows have 🙂
- Some Patience and 1 minute.
Hiding the Files
- First, create a folder or head to any location on your disk. In my case, “D:\NF“. And place all the files you want to hide with any JPEG(jpg) image in that folder. This is the image behind which you want to hide your files.
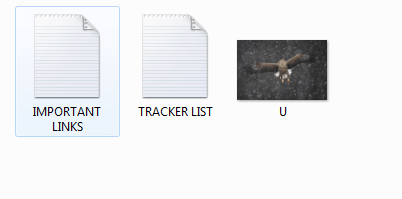
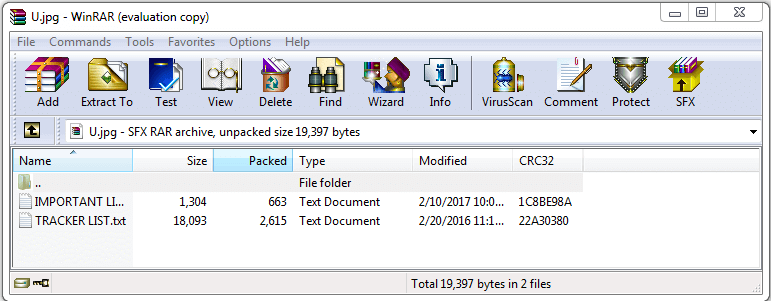
- You can see there are two files “IMPORTANT LINKS & TRACKER LIST” and image file “U” behind which I will hide these two files. The file may be one or many, it is up to you.
- Now, select the files and right-click on “IMPORTANT LINKS & TRACKER LIST” and tap on “Click to archive“.
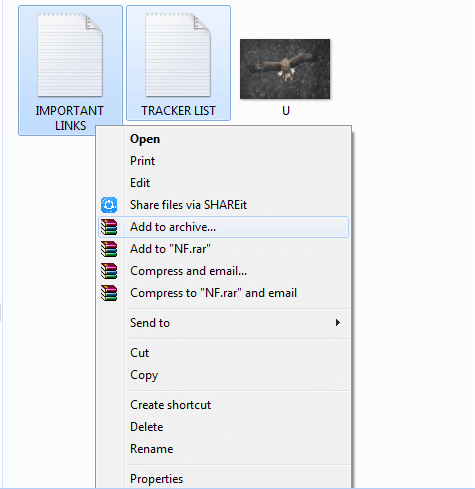
- Here you will be having two new files “NF.rar & U.jpg“. I have named the RAR file to “NF“.
- Let’s go to CMD because the actual trick works here only. To open CMD at that directory, press “Shift+Right Click” and select “Open command window here“.
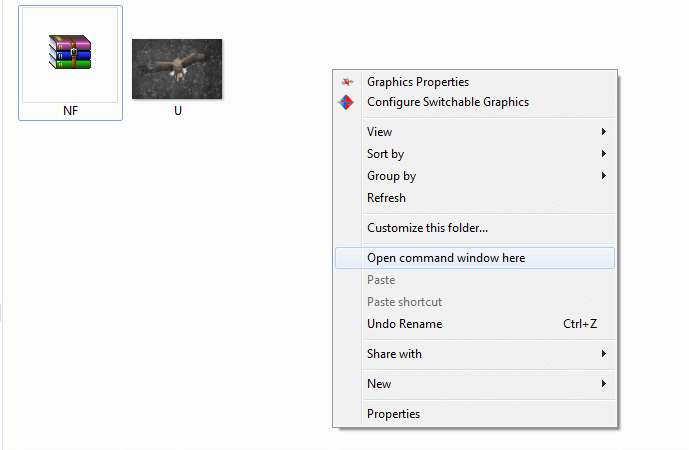
- Type in CMD this command and hit enter.
copy /b image name.jpg+rar file.rar image name.jpg
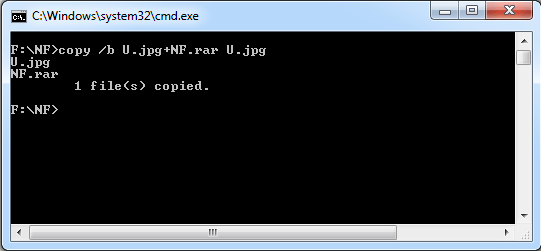
Wow!
You have successfully hidden the files inside the image.
To check whether the files are inside the image or not, open the jpg file using WinRAR.
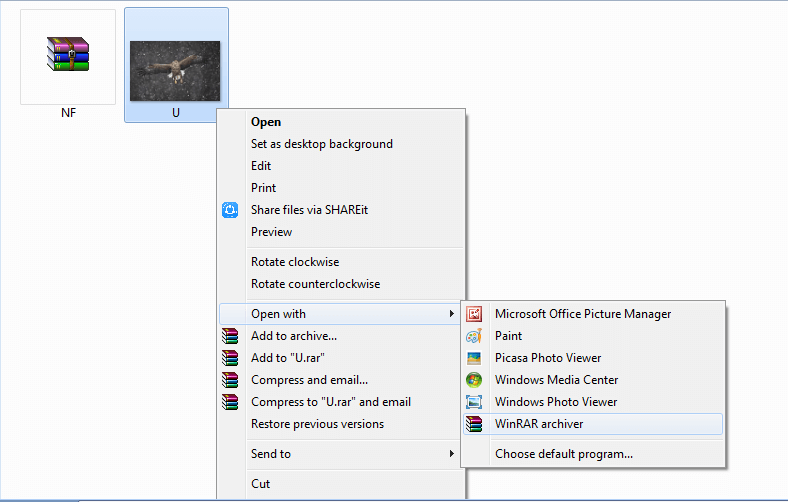
The two files must be there.
Accessing the Files
Now you might be thinking that if they are hidden behind the image, how to fetch it again?
It’s simple. Just like extracting normal RAR files, we do the same here also.
- Open the image “U” using WinRar.
- Select the files once opened and extract the files wherever you want them to be placed.
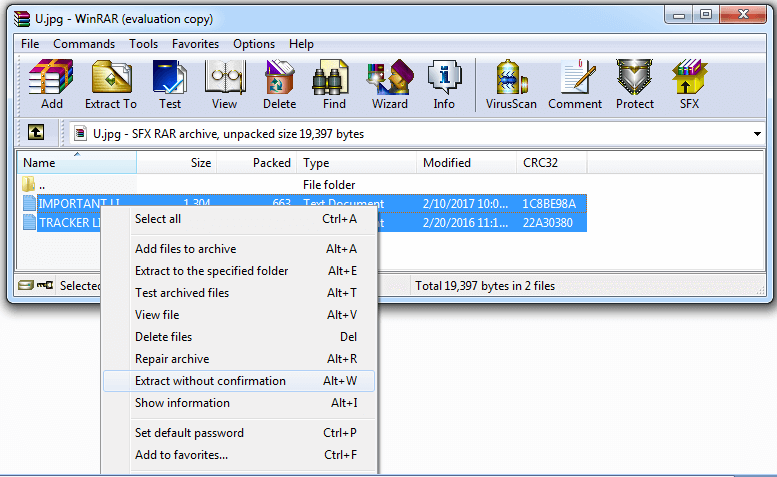
- Or alternately, rename the file from “U.jpg” to “U.rar” and now you can very simply extract them without any confusion and problem.
So, it all about the “Hide File Behind Image”.
Remember to share it!

