Say, you have highly confidential data in an Excel sheet that no other individual must alter at any cost. However, the data must be visible to anyone who intends to view it. In such a case, it is essential to protect your worksheet in such a way that the cells containing your confidential data are locked for editing. This article discusses the various ways through which you can lock a Excel cell and prevent editing on such cells.
How to Lock an Excel Cell – Prevent Editing
- Select the individual cell or range of cells that you want to lock in Excel.
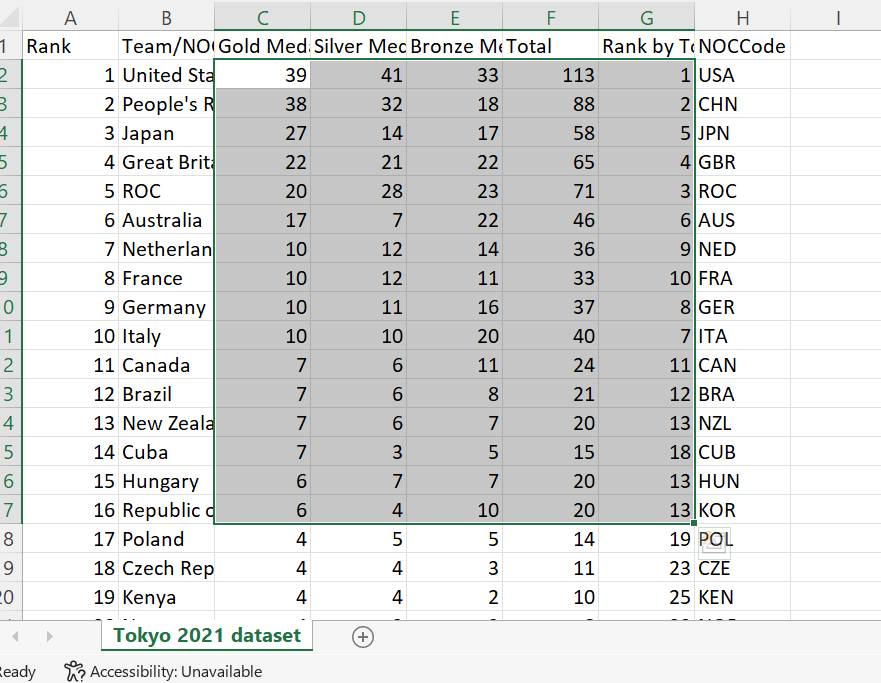
- Go to the Home tab from the menu on the top.
- Under Home, find the Alignment section.

- In the alignment section, click on the small arrow-like icon at the bottom right to expand the Alignment Settings.
- This will open the “Format Cells” window. Go to the Protection section in “Format Cells”.
- Click on the checkbox next to “Locked”.
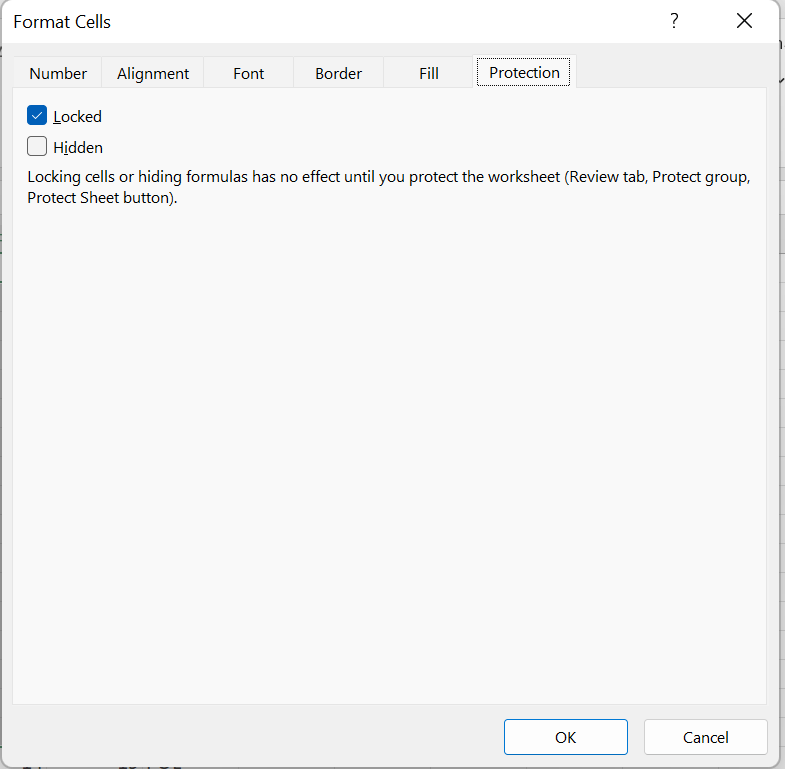
- Click on OK to close the “Format Cells” window.
- Now, you must turn on protection for the sheet or workbook to effectively lock the cells in your sheet.
- From the menu above, go to the Review tab.
- In the Review tab, find the “Protect” section.

- Under “Protect”, click on the “Protect Sheet” button.
- In the “Protect Sheet” window, make sure to checkmark the “Protect worksheet and content of locked cells” option. You may or may not enter a password of your choice. Confirm your password when prompted, that is if you decide to enter a password.
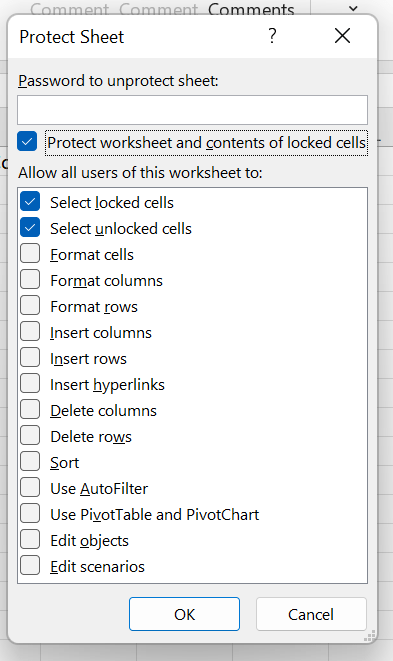
- Click on OK. Your cells will now be locked in Excel and cannot be edited or formatted by others
Alternate Way to Lock a Excel Cell
- Select the cell or range of cells that you need to lock.
- Right Click on one of the selected cells and click on “Format cells” from the menu.
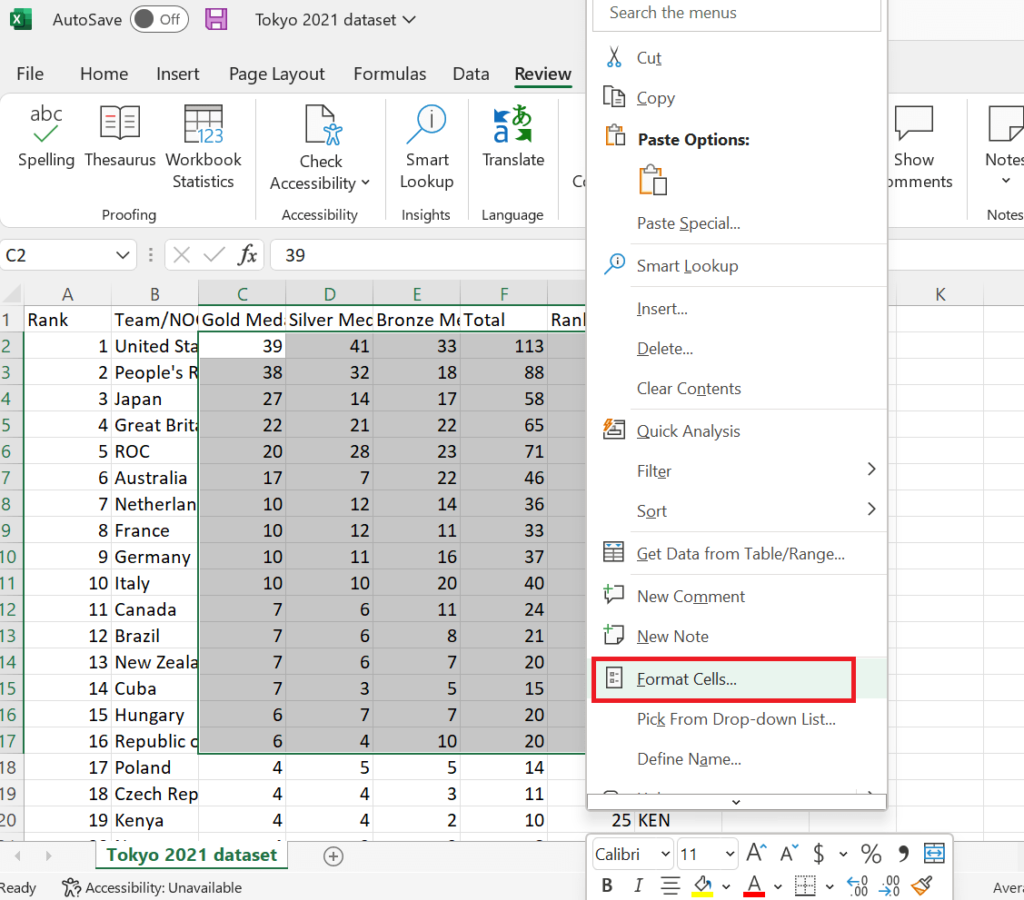
- In the Protection section under “Format Cells”, click on the checkbox before “Locked”.
- Click on OK.
Alternate Way to Protect Excel Sheet
- Right-Click on the name of the sheet at the bottom.
- Select the “Protect Sheet” option from the menu that follows.
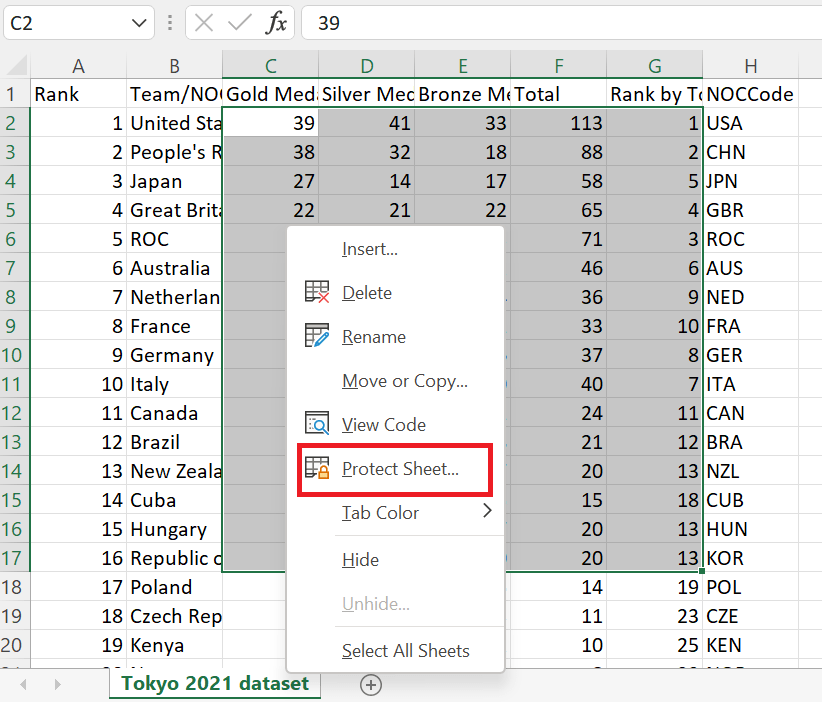
- Further, enter a password of your choice in the “Protect Sheet” window. Although, this is an optional step. Click on the checkbox next to the “Protect worksheet and content of locked cells” option.
- Select or deselect the options like “Format cells”, “Format columns”, etc., according to your choice.
- Click on OK. Your cells shall be locked in Excel and cannot be edited.
How to Prevent Locked Cells from being Selected
- Go to the Review section from the menu at the top.
- Under the Review section, you can find the “Protect” category.
- Click on the “Protect Sheet” option.
- In the “Protect Sheet” window, click on the checkbox next to “Select locked cells”.
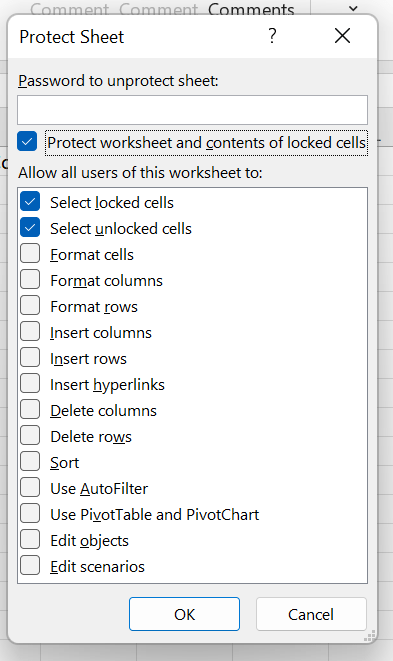
- Click on the OK button to confirm your changes.
There are many ways through which you can prevent editing of data in Excel like Protecting Sheet, Protecting Workbook, Encrypting Workbook with Password, etc. Similarly, simply locking the cells is an efficient method too. It allows for a more customizable way to ensure protection.
- How to Remove Duplicates in Excel
- How to Get The Most Out of Google Calendar
- How to Add Videos to Google Slides
We hope you find the above-mentioned steps to lock an Excel cell easy enough to follow. Are you aware of any other methods to protect the formatting of data in Excel? Do let us know in the comments.

