According to estimates, new social media stars are getting discovered and going viral every day mainly because of their Instagram reels appearing on others for your page. Needless to say, if one wants to become a successful influencer these days, posting Reels on the platform is a must. However, creating and uploading new Reels daily can be challenging since the editing process can take hours; thus, we bring you the best ways and techniques to schedule your Instagram reels in advance.
Reels build business their brand name, and creators can increase engagement on their posts by uploading relatable short videos. But it is equally important to have a consistent record of uploads to keep constant attention on their posts, and this is where knowing how to Schedule Instagram Reels will come in handy.
How to Schedule Instagram Reels Using Creator Studios
Meta platform users can schedule both Instagram and Facebook Reels using the Meta Creator Studios. This is more of a recent change since before, creators were only allowed to schedule their posts or videos and not stories or reels. But now there is no such limitation, luckily.
Here is a guide on how to use Creator Studio to schedule Instagram Reels:
- Go to the Facebook Creator Studios.
- Then, click on the Instagram icon and choose the Create post button.

- Select an Instagram feed or IGTV from the option. (It will be uploaded as a reel, don’t worry).

- Organise the video by editing, cropping, adding filters etc.
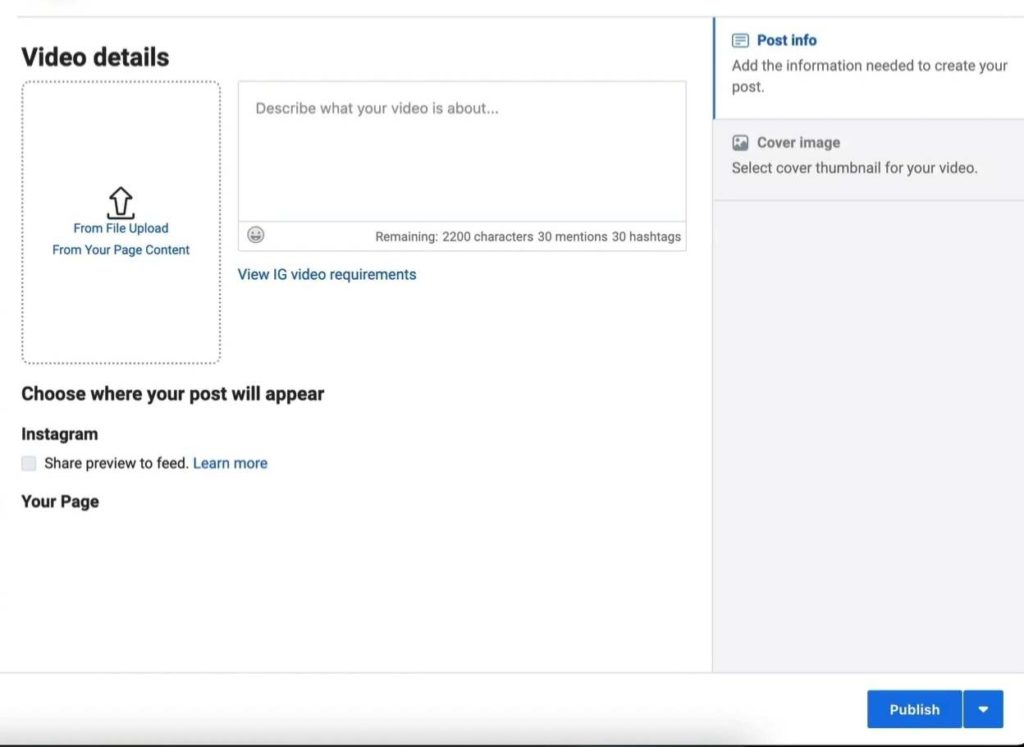
- Write your captions and hashtags.
- Lastly, schedule the reel by setting the time on the clock. (If you don’t know precisely when you want the reel to publish, save it as a draft for now and set the clock when you decide the time).
Important things to know:
- You can only use Facebook Creator Studio to schedule Instagram reels if your Instagram account is linked to a Facebook business page.
- On the Facebook Creator Studios page, it is easy to locate the option to create Reels for Facebook since it is present right at the front. But for Instagram, there is no such option that reads “create reels”; instead, you will have to create a post icon and choose between Instagram Feed or IGTV (depending on how long a video you upload). But not to worry, because the video you select will be uploaded as a reel since Instagram considers all non-story videos as Reels nowadays.
How to Schedule Instagram Reels In Instagram App
Instagram very recently updated its feature to schedule Instagram posts. This might be the easiest way of all. However, this is not showing on many users’ devices for unknown reasons. For those who have this feature available on their App, here is how to proceed with it:
- Launch the Instagram app.
- Go to your profile and tap on the hamburger icon.
- An Instagram menu will appear wherein you will see an option to schedule posts. Tap on that and create a post.

- Or you can create a new post as you generally do by tapping on the + icon.
- Upload your reel, and move forward to write its caption, tag people, add location etc.
- In the same editing section, you will see the option for advanced settings at the bottom. Tap on that.
- This is where the schedule this reel option must appear for the reel you edited. You can use that and set the clock to schedule the Instagram Reel.

- After you’re done, you can see that you scheduled a post in your activities section.
If you’re one of those users who can’t see the schedule post feature on their App, we suggest updating the App from the Google Play store or converting your Instagram account into a business account. If you can’t find the option to schedule a post, then follow the next methods.
Try Third-Party Apps to Schedule Instagram Reels
Later App
Later is one of the most popular third-party apps that let you schedule your Instagram reels in advance. Keep on reading to learn how:
- Download the Later App from Google Play or Apple Store.
- Open it and create an account. (You can’t directly log in with Instagram, you must have an account on the App)
- Link the newly made account with your Instagram ID by logging in to its details.
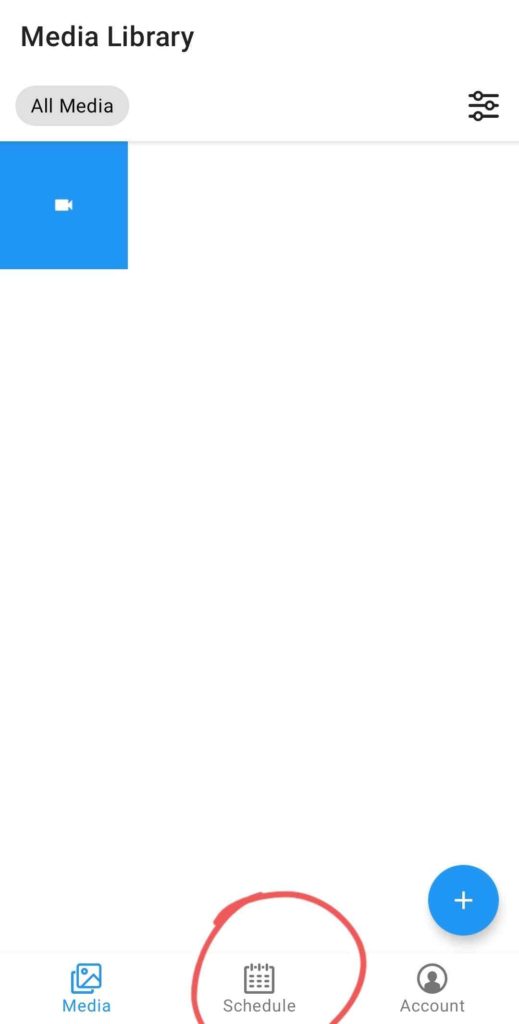
- You will be led to the media page, where you will see no media has been uploaded. You can hit the + icon to upload your reel.
- Then go to the Calendar icon at the bottom and start editing by clicking on the pencil button.
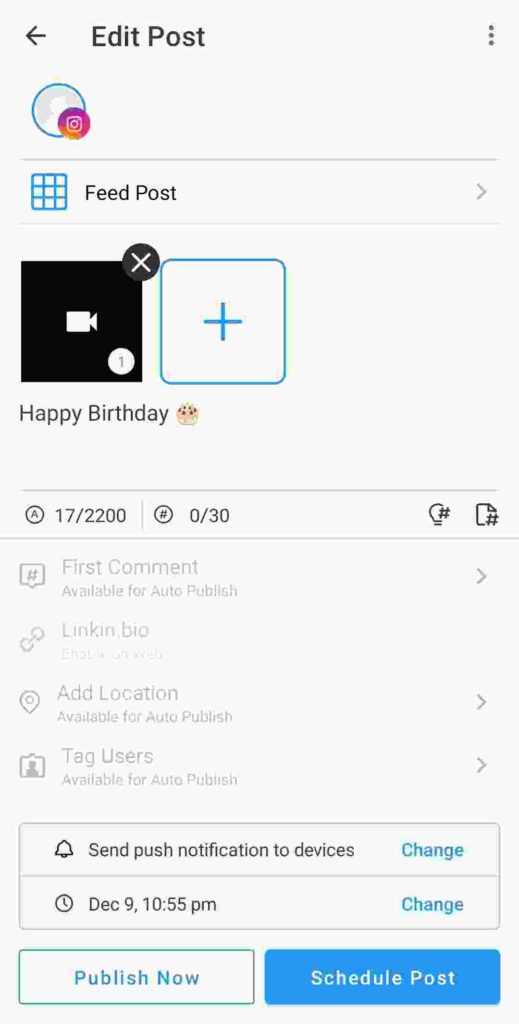
- On the next page, select the reel from your media on the later App, and schedule the date and time.

- Add a caption and hashtags, and then select if you want to auto-upload the reel or want a notification when the time is up. Auto upload is only available for business accounts, whereas creators or personal profiles will only get a mobile notification.
- When you get a notification, click on that and hit share on Instagram reels.
- The reel will be automatically opened in the Instagram edit section, change the cover photo or caption here and hit share as reel.
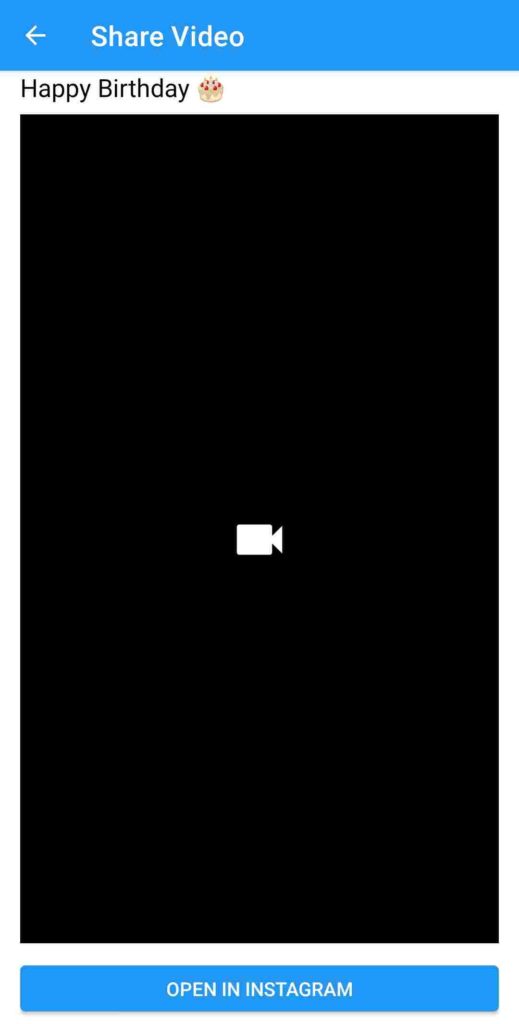
That’s it; the reel will be uploaded to your Instagram profile at the scheduled time.
Preview App
Preview App is a premium alternative for users who want the scheduled reel on Instagram to be auto-uploaded. This feature especially helps creators save time because their reel is automatically uploaded when the timer goes off.
They can create and schedule several reels at a time and don’t even need to manually upload them at the time. The App will do all their work. This is helpful when you don’t have access to your phone but require uploading a reel.
- Download the Preview App from Google Play Store.
- Launch it and log in with your Instagram account on the App.
- The App will ask permission to access your profile information and media on your Instagram account. Grant it.
- Once your account is opened in the preview app, slide to the reels section.

- Next, tap on the + icon on the top right corner of the screen. And Select the video from the gallery. Image
- Then tap on that video when shown in your reels section; it will open an options bar at the bottom. Click on the pencil icon to edit the upload.
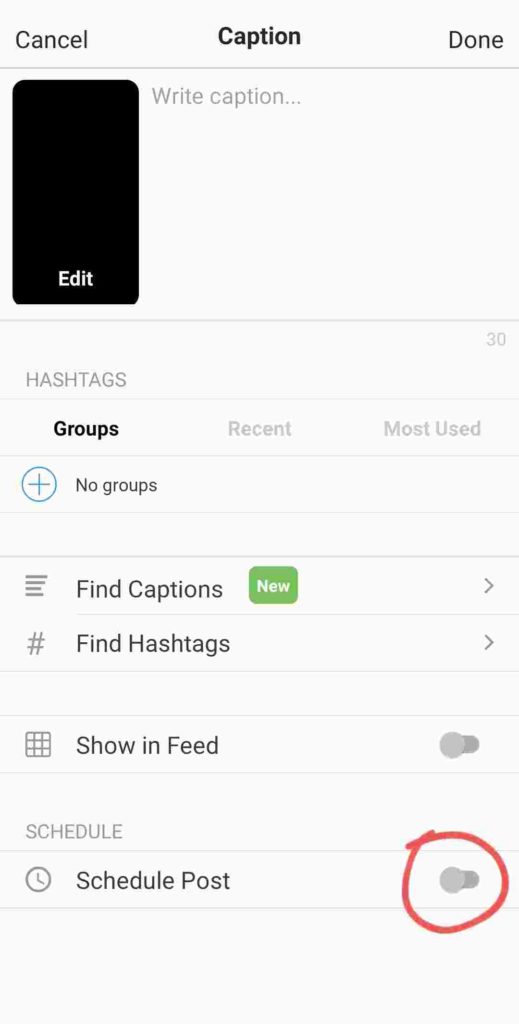
- In the edit section, you can add Captions etc., and by scrolling down, you will find the option for schedule posts. Turn its toggle on.
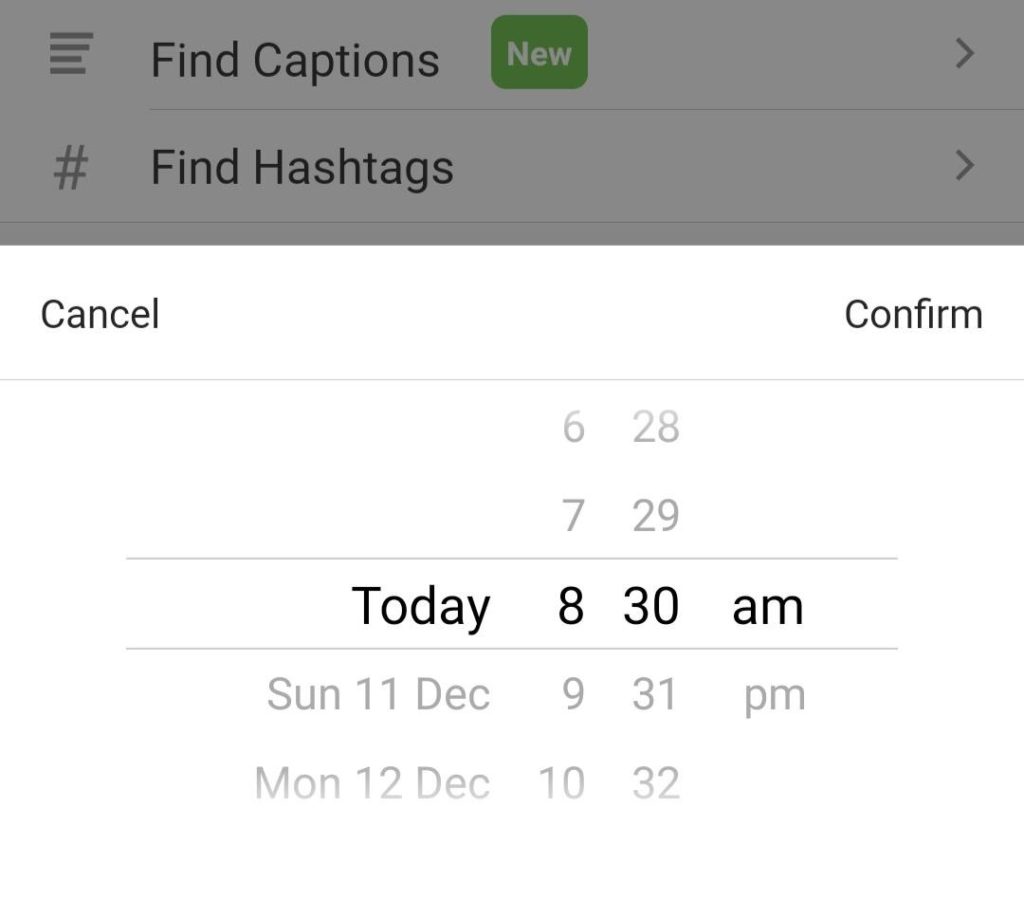
- The App will ask you the time and time zone at which the reel is supposed to go online and set the clock accordingly.

- Lastly, turn on the toggle for auto upload. As mentioned before, this feature is only available for premium users; thus, if you use the free feature, the auto upload will not turn on. Instead, you will get a notification reminder when it is time to upload the reel.
Related Posts:
- How to Upload High quality Reels on Instagram
- How to Fix Instagram Reel Not Showing
- How to Add Full Reel on Instagram Story
Conclusion
Instagram Reels, without a doubt, are the most prominent internet sensation today. And if a creator cracks the code on what the audience wants, they can go viral overnight, making reels. Consistent uploads are just one trick that the audience loves, and scheduling your Instagram reels will help you achieve that.

