Today, digital presence is the bread and butter of various businesses, and having a firm grasp of the online community is necessary to gain great connections. Adding an Outlook signature is one of the ways to build a reputation and stand out in the eyes of your clients. Acting as your digital business cards, they help the targeted audience reach you efficiently and speed up the communication process.
While some may consider it a daunting process if done correctly, Outlook signatures are bound to create a sense of professionalism for your brand. Thus, we bring you a guide on how you can add and edit Outlook signature in Office 365 in various ways.
Add an Outlook Signature Using the Web Version
You can also add the Outlook signature in Office 365 on every new message or reply using the Outlook Web version. Here is how:
- Log in to your Outlook account on the website.
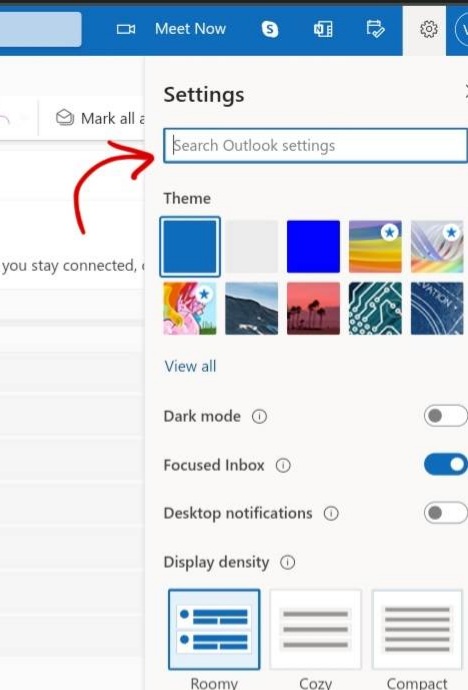
- Go to Settings by clicking on the gear icon on the top right side of the bar.
- In the search box that reads “Outlook settings“, enter email signatures.
- This will open the signature view on your screen, wherein you can add a new Outlook signature.
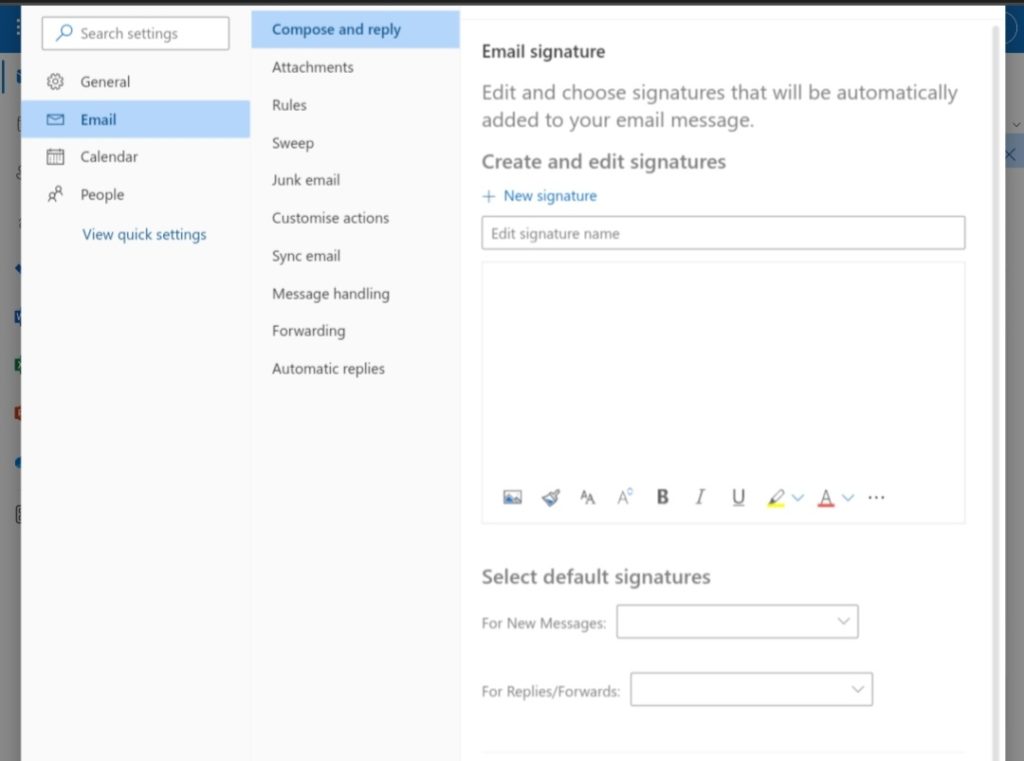
- Click on create a new, and enter the signature’s name.
- Write your details accordingly and move forward with changing formats and editing.
- Editing tips, write your name in bold and bigger font, whereas other details should be written in different colours to make a better impression.
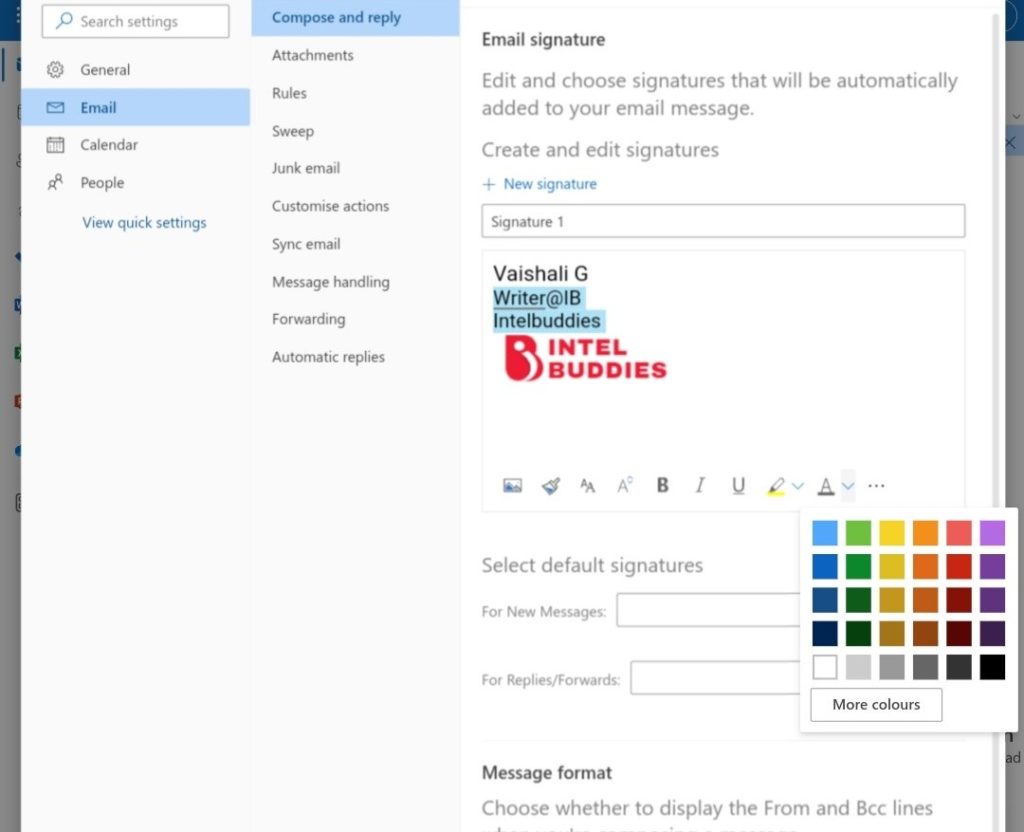
- If you want, try writing in capital letters and space out the rest of the information. Make sure to add a hyperlink to the website name, so people can be directly led to your page by clicking it.
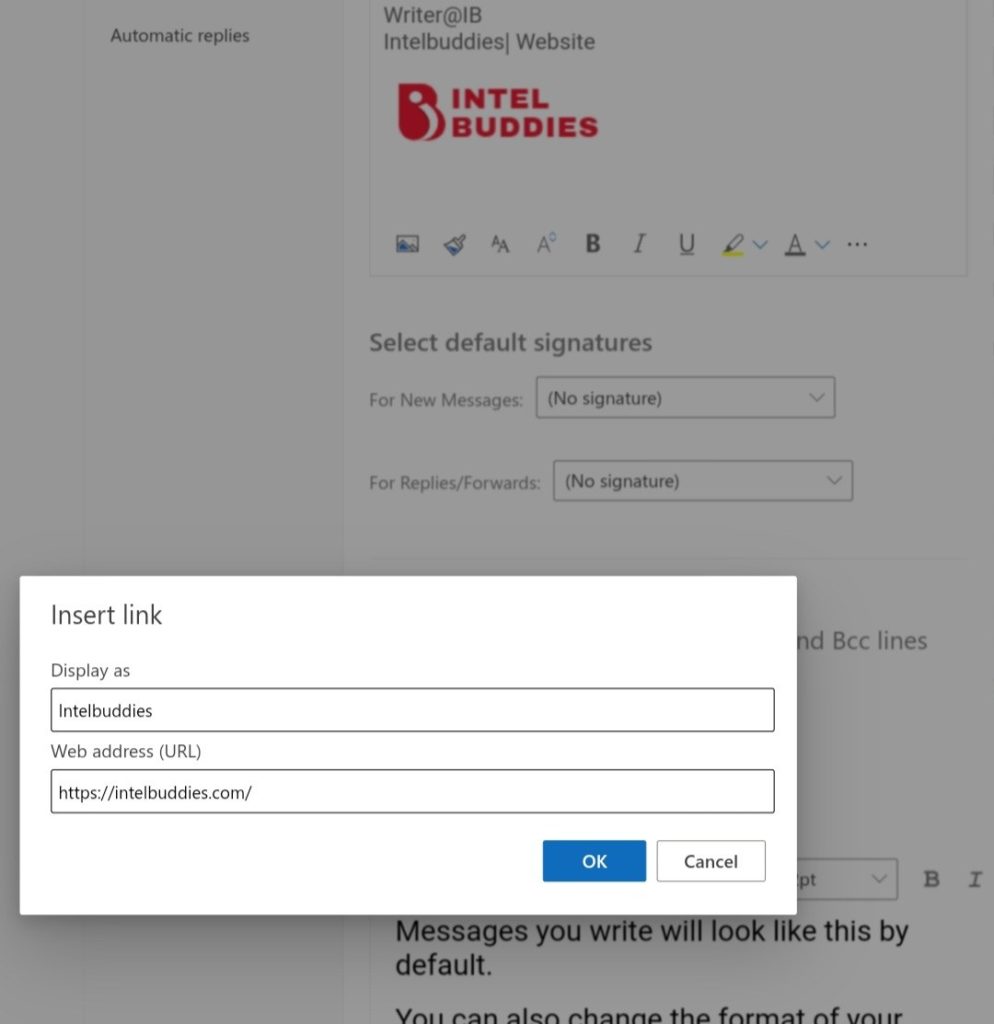
- Remember to add a logo to accentuate professionalism. To automatically insert the Outlook signature on everything, select the signature name for new messages and replies/forwards.
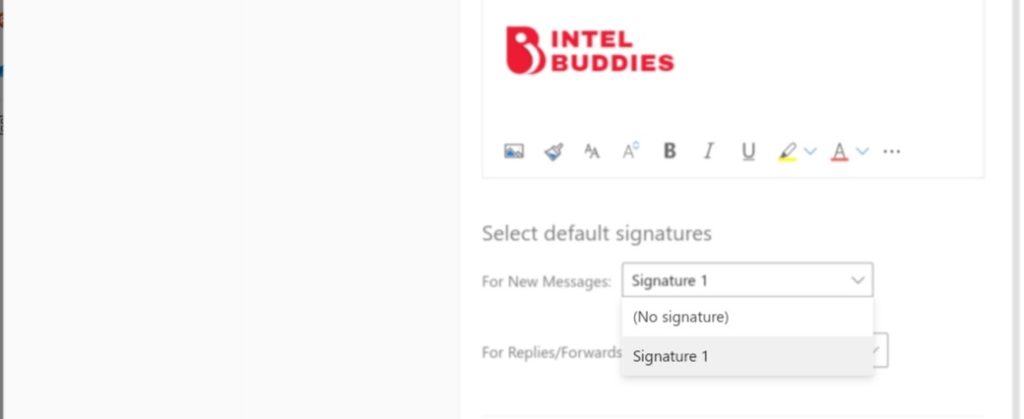
- Hit Save when your signature is created as you want.
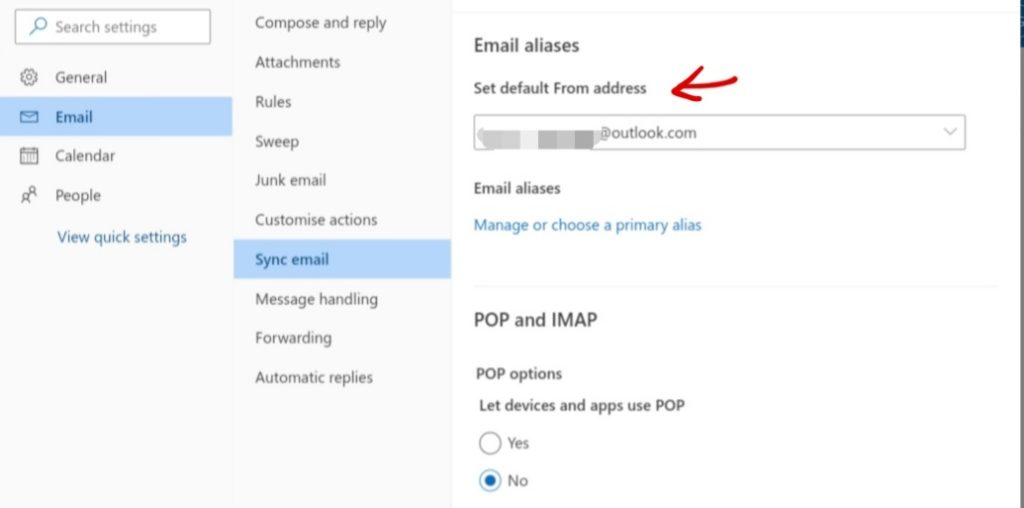
- To add this outlook signature to a default email account, go to sync email and select the email address.
If you hit, save before ticking the necessary boxes for automatically adding the signature on all your messages, then worry not. Because one can manually add the saved signature in the message you are creating by the following steps:
- Go to your mailbox and choose a new message.
- Start by typing your message entirely until the space of the signature remains.
- Go to the insert option at the top bar, and select the signature.

How to Add Outlook Signature in Office 365
In the Outlook app, it is enabled to create multiple signatures and assign them to different email accounts. As in Outlook Web, you can automatically include your signature when sending a new message and replying to or forwarding an email.
You can add multiple signatures and assign them to different accounts if you choose to operate the Outlook App. Also, the app will automatically attach the signature to your message if you set it to do so.
Here is how to add an Outlook signature in Office 365 using the Outlook app.
- First, open your Outlook account on the app.
- Go to the search section on the top bar that reads “what do you want to do” and write Signatures here.
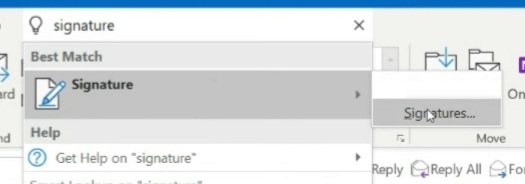
- Once you select it, the signature view will pop up; click on the New icon to create a new signature.
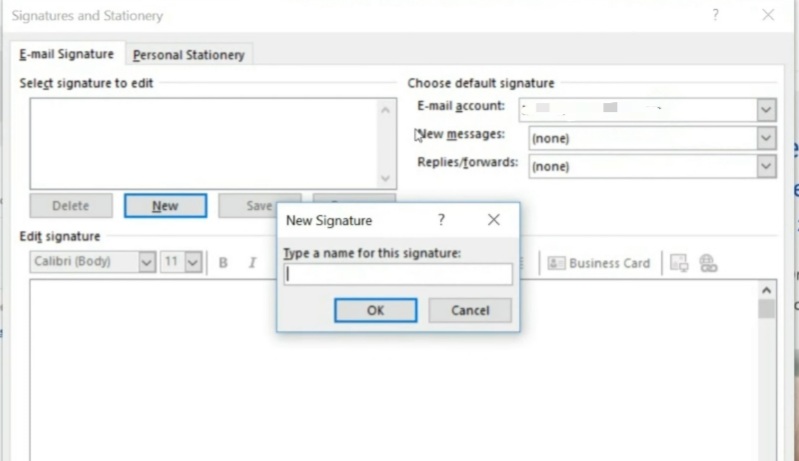
- You can name this signature to identify your creation from all your saved signatures.
- Inside the text box is where you begin typing your details, such as your Name, Job title, Phone Number, Website details, etc., and you can even add your website’s logo underneath the signature.
- Once your signature is complete, add the default email for this new signature that you’re creating.
- Here, you can choose one signature for new messages and another for replies and forwards.
- Hit Save when done.
The signature will be automatically added to each new, reply, or forward message you create using the default email address you mentioned.
Manually Add a Signature in Outlook
If you have created and saved a signature but haven’t set it to a default email address, it won’t automatically appear on the app, but you can manually add it by either
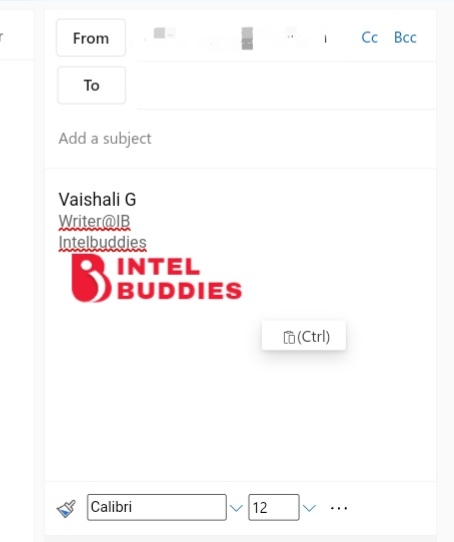
- Copy-pasting the desired signature at the bottom of the email. (This you can do in both mobile or PC app versions.) or
- By clicking on the signature on the toolbar of the new message. The signature will appear underneath your email. If the shown signature is the wrong one, you can right-click on it to find the names of all your saved signatures. Select the correct signature by clicking on its name.
Edit the Signature
Suppose you’re creating a new email and notice that the contact details are outdated. There is a method to update it right here without going back and opening the signature view. For this, just,
- Right-click on the current signature that has the old information.
- Then select signatures from the drop-down menu.
- The Signature view will pop up on your screen directly. Choose the name of the signature on which you want to update the information.
- Complete editing it and hit Save.
Use AI Tools to Generate Your Outlook Signature
If you don’t have enough time or if you prefer to have an AI-generated signature for you to copy on your email, try using a free email signature generator. One such tool is offered by WiseStamp, where you only need to fill in a few details, and a new Outlook signature will be generated for you automatically. Follow these instructions to learn how to create an outlook signature online in a few minutes.
- First, open the WiseStamp web page, and log in by creating an account.
- Add your professional details, such as your name, job title, website, etc.
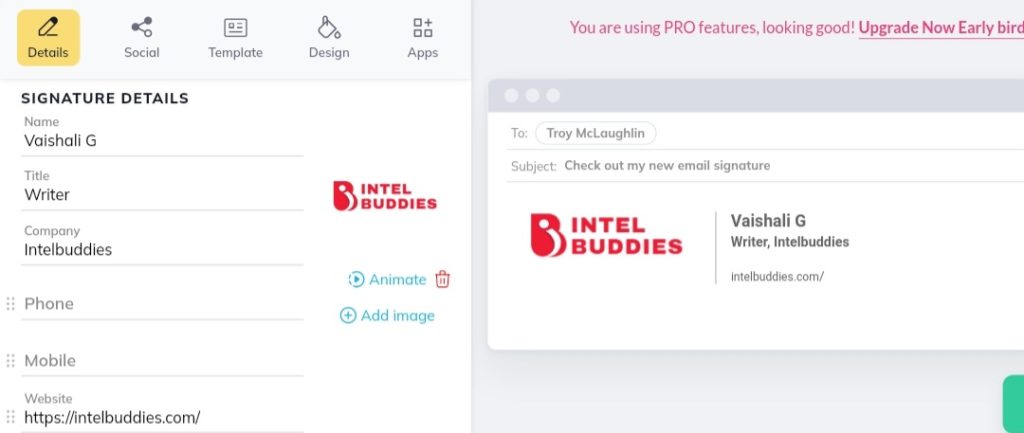
- Add an image for the signature logo from your gallery.
- The generated signature will be displayed on the side. You can then edit it by changing its font, size, logo shape, bolding your name, etc.
- Once you’re satisfied with the signature shown on the right side, you can click on done.
And just like that, your outlook signature is ready to use.
Add Outlook Signature on Mobile App
The trick mentioned above is handy for those who only have access to the Outlook App on their phone. Since you can create the signature using online tools, copy and paste it into the Outlook App.
- Launch the Outlook App on your phone.
- Next, head to the account menu and click on the gear icon at the bottom of it to go to the Setting.
- Then, scroll down to find the Outlook signature and click on that.
- Now, either type your signature details manually or paste the AI-generated signature or the web version signature in the app.

And that’s it. Now you can create and add an Outlook signature even while using it on your phone.
Related Posts:
- How to Export Outlook Messages to PDF Quickly
- How to Recover or Reset Gmail Password
- How to Find Your Gmail Contacts
Conclusion
As you must have understood by now, it is not difficult to add an Outlook signature in Office 365, although its benefits are endless. Thus, if you also want an easy way to create a brand impression on your clients, try making your outlook signature. We hope you found the instructions in this post helpful, and if you have any queries, please leave a comment below.