A screenshot might come in handy and we usually take it on our Android phones very easily. Taking a screenshot in Windows 10 may confuse you.
Screenshots are helpful whenever you want to share your screen with your friends (take an example of your chats). Well, taking a screenshot is easy but not all know how to take it? You’ll see screenshots in this guide also and guess what? These all are taken very easily and quickly without using any tool or third-party software.
In this guide, you’ll learn how to take a screenshot in Windows 10.
Screenshot in Windows 10 (Really Easy!)
First, when you are reading this, it might get you humped. Yes, what so hard in this? I can take a screenshot on my PC in windows. Don’t get me wrong, you have plenty of options available to take screenshots. And I will break down those ways for your Windows 10 to do it quickly.
Full-Screen Screenshot in Windows 10
You can easily capture the full-screen of your Windows 10 with just a keyboard shortcut. Here are the quick steps to take a full-screen screenshot in Windows 10:
- On your keyboard, press Win+PrtSc keys simultaneously.
- You’ll notice a dim screen of your PC or laptop for a fraction of a second.
- Now, go to My PC>Use>Pictures>Screenshots.
- Here, you’ll find your captured screenshot (full-screen).
Yes, there might be chances that you don’t need the full-screen screenshot, you can use any tool to crop it as per your wish.
Print Screen
As there is a problem of full-screen on the above method, it will resolve that in the process itself. You can use the Print Screen keyboard key to take a screenshot in Windows 10.
- Press the PrtSc key from your keyboard.
- Now, open any image editor. (MS Paint, Powerpoint, etc).
- Paste using the keyboard shortcut Ctrl+V.
- Here, you can crop the portion you need and cut the remaining.
- Now, simply save the file.

It is the simplest way to take a screenshot on a PC in any Windows.
Snipping Tool
Windows has an inbuilt tool called Snipping Tool which we generally use to take a screenshot on Windows. You can also use that awesome free tool to take a screenshot in Windows 10. It lets you select the area which you want to capture and save it to your desired location.
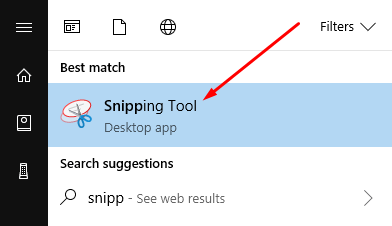
- From the start menu, search for Snipping Tool.
- Click on the New button and select the area.

- Once done, tap on the Save option.
In my recommendation, it is the best tool available for windows.
Take a Screenshot of a Part of the Screen
Just like the Snipping Tool which allows you to take a screenshot of your desired area, you can do this using a keyboard shortcut in Windows 10. It also lets you select the area which you wanna take a screenshot of and save it. But, it will only work on Windows 10’s Creator Update, so check for an update (if any).
- Press Win+Shift+S and select the area which you want to capture.
- Now it is copied to your clipboard.
- Open any image editor just like you did above and paste it (Ctrl+V).
- Save the file.
Using Xbox Game DVR
There is an inbuilt Game DVR tool available to record your game screen while playing on Windows 10. But, it can also be helpful in taking screenshots in Windows 10 as you can also take a screenshot of gameplay videos.
- Press Win+G to open the game bar.
- Now, you can see a bar-like option come downside of your screen.

- Click on the camera icon (or press Win+Alt+PrtSc) to take a screenshot.
Note: At the first time, it will ask “Yes, this is a game” (if prompted), tap on the checkbox.
To open the saved screenshot, open the Xbox app and select “On this PC” and you’ll be able to see the captured screenshot.
Using Lightshot or Snagit
All the above methods are easy and cool and anybody owning a PC can use them. But, if you want some powerful screenshot tool that can give you plenty of options. For bloggers, like me or anyone else, these tools help a lot.
Snagit by TechSmith is a paid tool that gives a large variety of features like Cropping, Drawing, Indication, etc. As it is not free and if you still need it, you can use the free trial to test its features.
Now, there’s one option also available which is totally free and provides some of the features like Snagit. Lightshot is another best tool to take a screenshot. It is lightweight, easy to use have fantastic options which a Snipping Tool can give.
Also Read: