Change the Screen Resolution: Have you ever faced this? You are cramming for an exam from a reliable website at the last minute.
But, the constant scrolling up and down to refer to some of the material frustrates you and ruins your study experience.
Don’t you wish that all the material be packed in single screen space?
This is where changing the screen resolution comes in handy.
Whether it is the above scenario or an improved gaming experience, changing the screen resolution in Windows 10 can guarantee an experience that is comfortable for the eyes.
This article talks about the method required to change the screen resolution in Windows 10.
What does Screen Resolution Mean?
A computer screen displays images and other visual information through pixels.
These pixels are arranged in the form of a two-dimensional grid to represent these images. So, when we say that the screen resolution is 1920 x 1080, this means that the screen has 1920 pixels horizontally and 1080 pixels vertically.
Therefore, the higher the resolution, the more information can be represented on the screen by Windows.
But, this also means that the size of the images and text will be diminished in size with increasing screen resolution. You can check the screen resolution of your Windows screen here.
Do you find even the minimum brightness level of your Windows screen too harsh for your eyes? Using Screen Dimmer, you can adjust the brightness level even lower than the minimum.
How to Change the Screen Resolution in Windows 10
- Go to Start.
- Search for Settings.
- Under Settings, click on System from the various sections.
- In System, go to Display from the menu on the left pane.
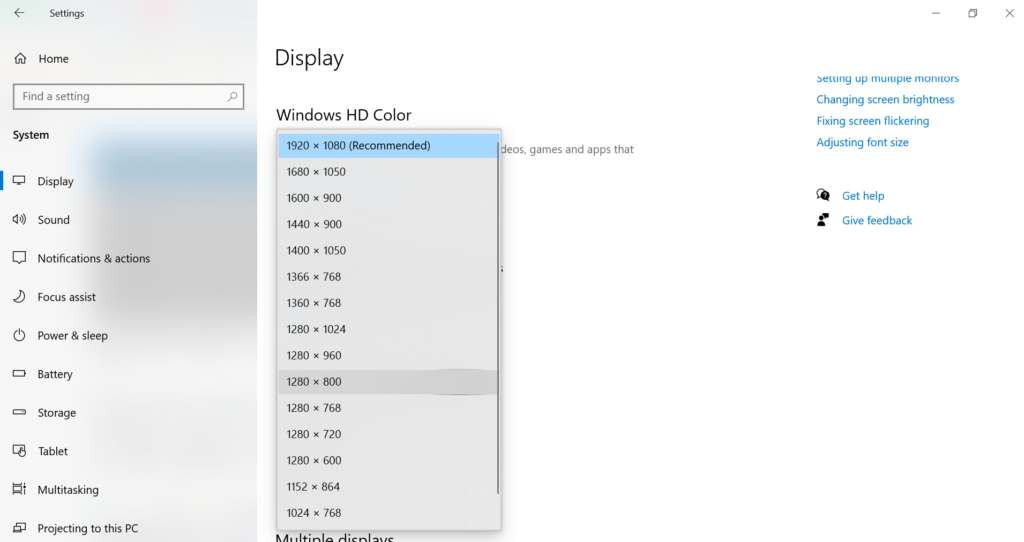
- In the Scale and layout section, you can find the “Display resolution” option.
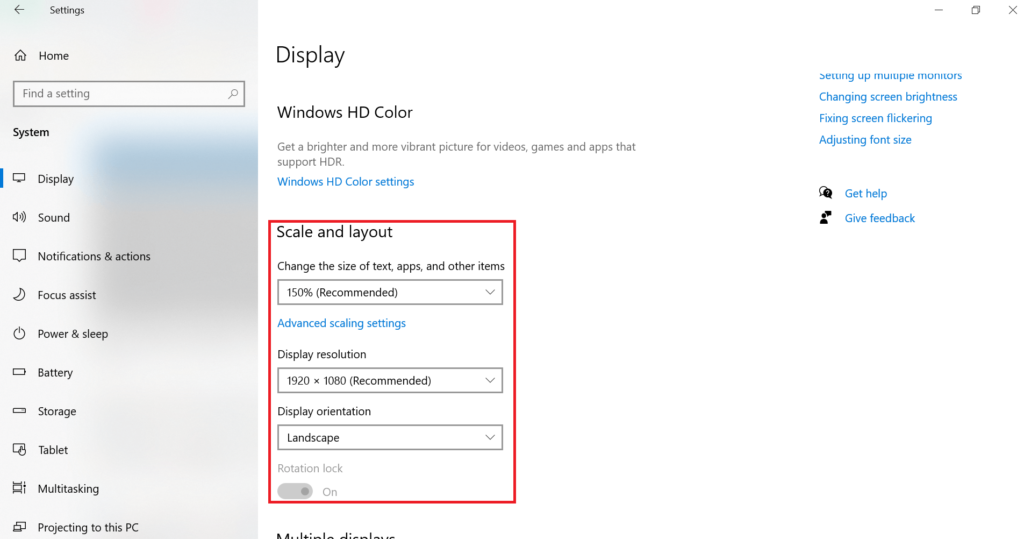
- Click on the drop-down menu and select the screen resolution of your choice from among the 16 screen resolutions.
- A box asking you to confirm the action will pop up. Click on Keep Changes to save the change or Revert to go back to the original screen resolution.
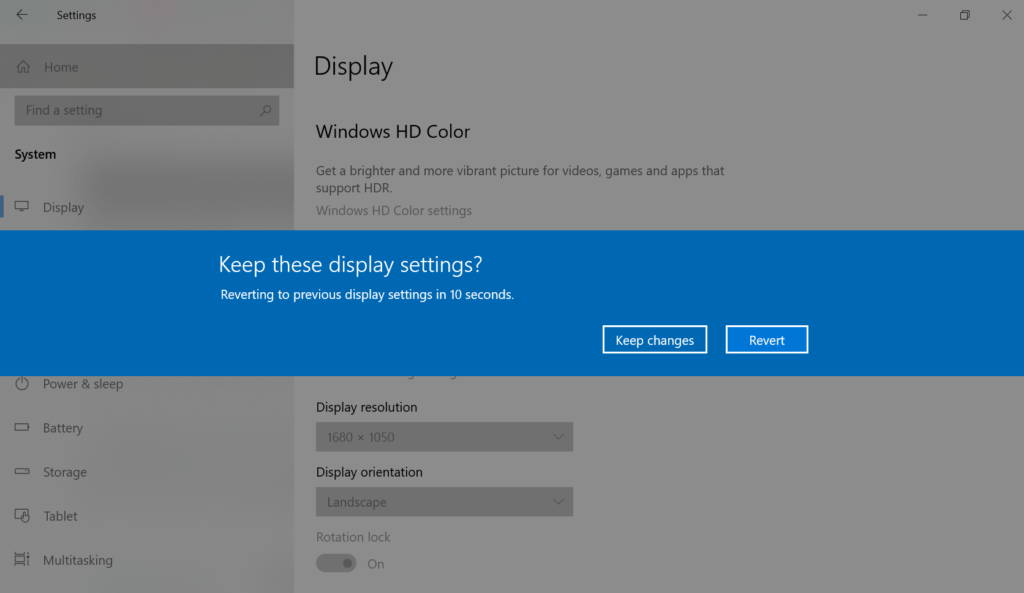
NOTE: Be quick while choosing either “Keep Changes” or “Revert” as Windows gives only 15 seconds to make the choice after which it automatically reverts the screen resolution to what it originally was.
Conclusion
So, that is all about the meaning of screen resolution and how we can change it on our Windows 10 devices. For a smoother and more convenient experience, while working, reading, gaming, and performing other activities on your Windows 10 device, you can resort to the method above to change the screen resolution.