
Pause Windows Update: Windows 10 updates are an excellent way too, as the name suggests, keep your system up to date.
Windows 10 updates involve small patches and fixes, improvement in some features, and the occasional variations in the user interface.
All of these seem like a deal every Windows 10 user would be interested in.
However, some of these users also prefer to install these updates according to their inconvenience and also as a precautionary measure against some problems that are a result of fresh updates. This article is for such users.
Through this article, we shall discuss the various methods that enable Windows 10 users to stop or pause the Windows 10 update.
Pause Windows 10 Update Using the “Pause updates for 7 more days” Option
- Go to Settings or press the Windows + I shortcut key.
- Go to Update & Security in Settings.
- You will be directed to the Windows Update page automatically. If not directed, click on Windows Update from the left pane.
- Click on “Pause updates for 7 more days” under Windows Update.
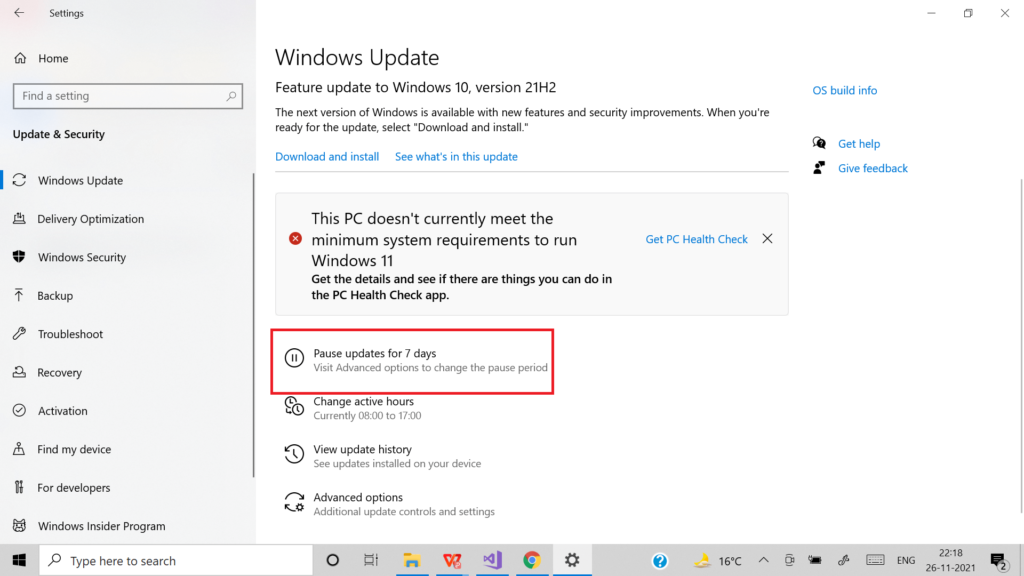
- If you want to pause the Windows update for a longer duration, you can click on “Pause updates for 7 more days” a total of 5 times. This will pause the Windows update for 35 days. After that, the option will be greyed out and you cannot pause the update until 35 days are over.

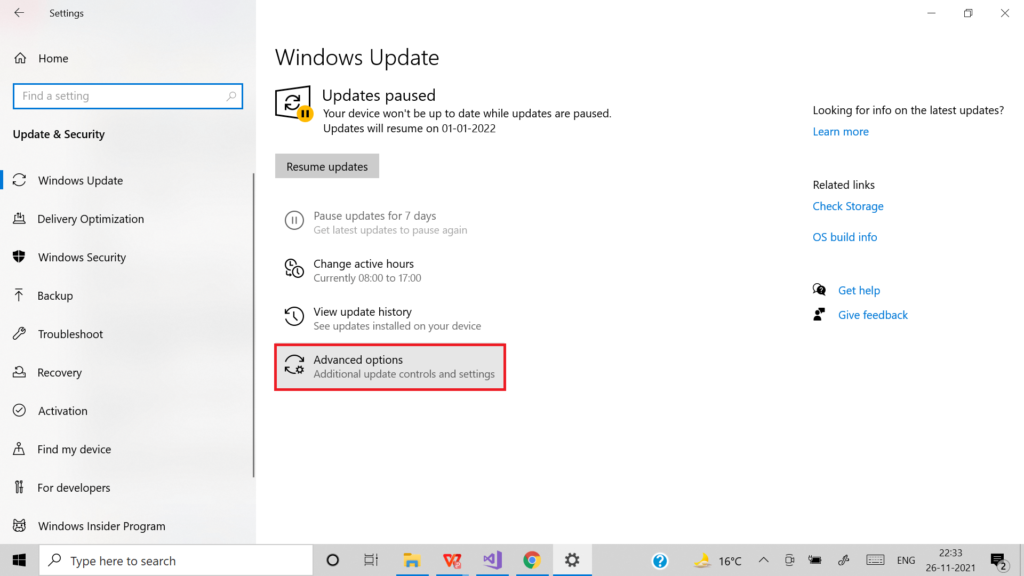
Pause Windows 10 Update Until a Specific Date
- Go to Settings or press the Windows + I shortcut key.
- Go to Update & Security in Settings.
- You will be directed to the Windows Update page automatically. If not directed, click on Windows Update from the left pane.
- Click on Advanced options under Windows Update.
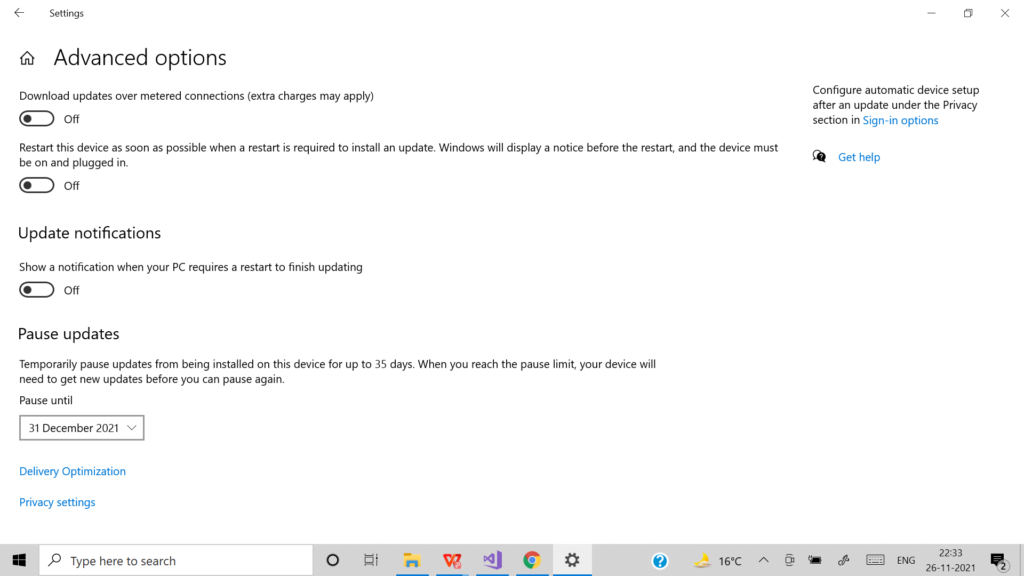
- Under Pause Updates, select the date till which you want to pause the Windows 10 update. Note that you cannot select a date later than 35 days from the present day.
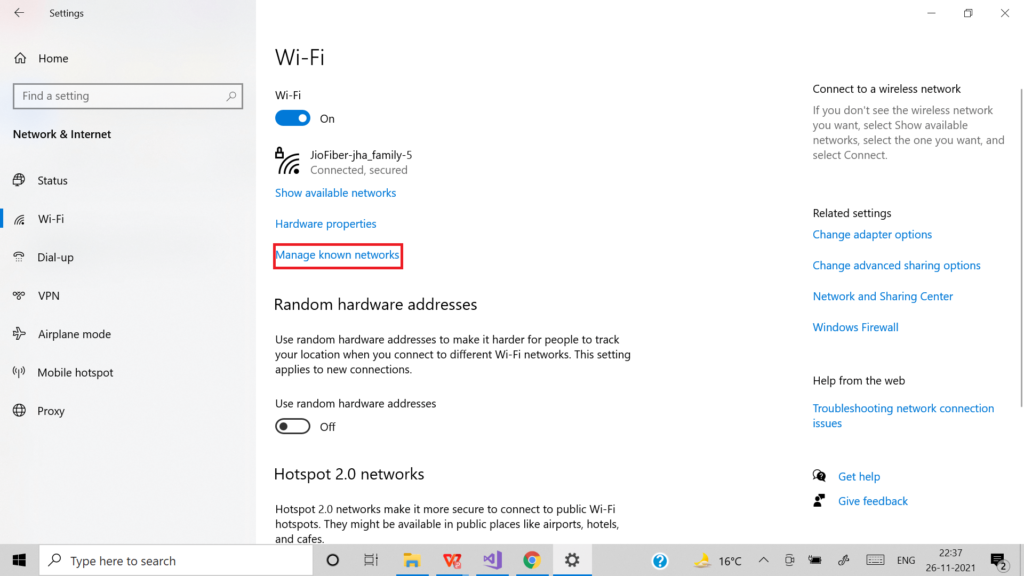
Mark Connection as “Metered” to Pause Windows 10 Update
- Go to Settings or press the Windows + I shortcut key.
- Go to Network & Internet under Settings.
- Select Wi-Fi from the left pane.
- Click on “Manage known networks” in Wi-Fi.
- From the list of networks on the left side, click on the network that you connect with for your online activities.
- Click on the Properties button.
- Under the “Metered connection” section, and toggle the “Set as metered connection” on.
- Now, go back to Settings.
- Go to Update & Security in Settings.
- You will be directed to the Windows Update page automatically. If not directed, click on Windows Update from the left pane.
- Click on Advanced options under Windows Update.
- Set the “Download updates over metered connections (extra charges may apply)” option to on.
- Whenever you want to download Windows 10 update in the future, you can turn the toggle off for “Download updates over metered connections (extra charges may apply)” and download and install the update over the Wi-Fi network.
Note: This method shall not serve the purpose of pausing the Windows 10 update if you are connected to a new Wi-Fi network that is a metered connection.
Here is an article that might help you temporarily disable WiFi in Windows 10 as another measure to delay the installation of the Windows 10 update.
Delay Windows 10 Feature Update Using Group Policy Editor
- Go to Start.
- Search for gpedit.msc.
- Click on OK to go to the local group policy editor.
- Now, browse through the path Computer Configuration > Administrative Templates > Windows Components > Windows Update > Windows Update for Business.
- Go to the setting “Select when Preview Builds and Feature Updates are received”
- Set this option to Enabled.
- To select the Windows readiness level, choose “Preview Build – Fast” from the drop-down menu.
- Now, enter the number of days (less than or equal to 365) for which you want to delay the preview builds or feature updates.
- You can also set the starting date for the preview build or feature updates as long as the starting date of your choice is less than or equal to 365 days from the current date.
Note:
- The above-mentioned method works only for deferring feature updates which are the important Windows 10 updates that launch around two times per year.
- Feature updates when launched often come with issues. So, it is better to delay the installation of these updates for a few months until Windows fixes those issues.
Delay Windows 10 Quality Update using Group Policy Editor
- Go to Start.
- Search for gpedit.msc under Start.
- Click on OK to go to the local group policy editor.
- Now, browse through the path Computer Configuration > Administrative Templates > Windows Components > Windows Update > Windows Update for Business.
- Go to the setting “Select when Quality Updates are received”.
- Set this option to “Enabled”.
- Now, enter the number of days (less than or equal to 30) for which you want to delay the quality updates.
- You also have the option to set the starting date for the quality update as long as the starting date of your choice is less than or equal to 30 days from the current date.
Note:
- The above-mentioned method works only for delaying quality updates which are small updates and more frequent than feature updates.
- In some Windows systems, you might not find the group policy editor. In such a case, you can either download it from a trusted source or resort to one of the other methods mentioned in this article to pause the Windows 10 update.
Schedule the Time for Installation of Updates
You have to restart the system in order to finish the installation of these updates.
You can either restart the system immediately and get that out of the way or you can schedule the time for installation according to your inconvenience, for example at a time out of office hours.
Here is how you can do so.
- Go to Settings or press the Windows + I.
- Go to Update & Security in Settings.
- You will be directed to the Windows Update page automatically. If not directed, click on Windows Update from the left pane.
- If an update is available for installation, it shall be visible under Windows Update.
- Click on the “Schedule for restart” option.
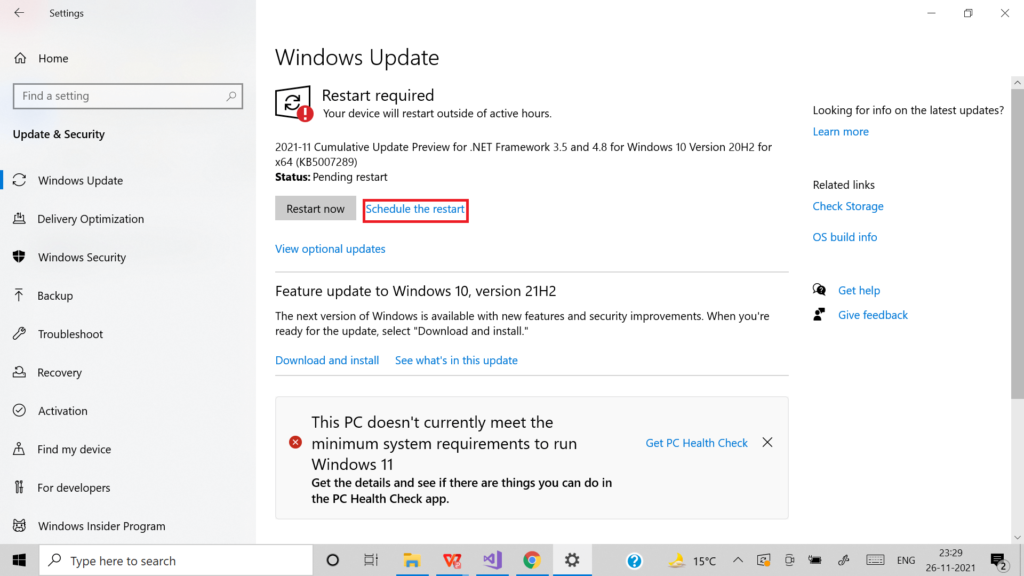
- Toggle the “Schedule a time” option to on.
- Choose a time and date for the restart.

- Click on the tick symbol at the bottom of the drop-down list for time to save the changes.
- How to Take a Screenshot of Windows Login Screen
- How to View Saved WiFi Passwords (Android, iOS & Windows)
Conclusion
If you don’t like the unplanned interruption caused by abrupt updates or you want to avoid the issues caused by new updates and wait till Windows fixes them, then you can resort to pausing or stopping the Windows update.
Any of the above methods shall work efficiently to enable pausing or stopping of Windows 10 updates.