Are you looking for a simple way to set Ringtone on your phone? Then you’re in the right place. Whether you are an Android user or an iOS user, your phone must include specific list of ringtones that you can set by default.
However, there is another way to set the Ringtone on your device that will increase the number of options for you. This trick is specifically handy for individuals who like to set customised Ringtone and/or to a specific contact. Therefore, here we bring you all the ways by which one can easily set any ringtone they like on any Android or iOS device.
How to Set Ringtone on Android Device
Setting a ringtone on an Android device is a relatively easy task. Much easier when compared to the iOS counterparts. Here, one can either choose from the default list of ringtones that come with the device or download a song or melody of their choice online and set that as their Ringtone. To select from the default list, follow the below steps:
- Go to your phone’s Settings.
- Click on the sound and vibrations section.
- Next, head on to the ringtone option.
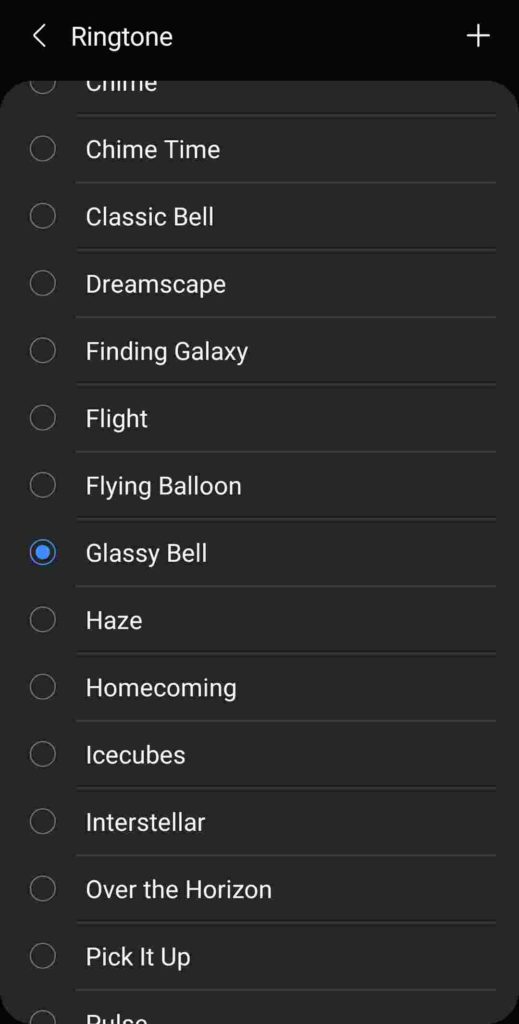
- Here you will witness a list of ringtones available on your device. You can try hearing them and then set the one you want accordingly.

- The exciting bit is that you can even select different Ringtone for different sim cards if your device lets you use multiple sim cards simultaneously.
Set Customized Ringtone on an Android Phone
Now to set a custom ringtone on an Android device, you will need to download the desired audio on your device. You can find it online or have somebody transfer it to you as an audio file.
- Next, move that audio file to your device’s “Ringtone” folder. You can do this from the file manager app or via a desktop.
- Once the audio in question is saved in the Ringtone folder, go back to Settings.
- Tap on sound and vibration and then on the phone ringtone.
- Go to my sound section, and here you will find the saved audio to be set as a ringtone.
- Click Save when done.
Now, this process can vary to a small extent in different models of Android devices. But the main steps of the method will remain the same. Furthermore, a ringtone generally plays for around 30 seconds. Therefore, you should trim the audio to ensure your favourite chorus or dialogue is played when it is set as Ringtone on your phone. There are various apps available online that let you edit audio clips.
How to Set Ringtone on an iPhone
The first method to set Ringtone on the iOS device from the default list of songs is given below:
- Go to the Settings app.
- Select Sound and Haptics.
- Go to Ringtone, and select any ringtone from the list.
But if you need more options, head to the next section.
How to Download a Custom Ringtone on iPhone
If you don’t want to set any ringtone pre-installed on the iPhone, you can even add custom ringtones. Here is a way to do it:
First, you have to download the audio (that is to set as a custom ringtone) on your device, which you can transfer from Mac or Windows PC using iTunes. Or if you’re using Mac OS, you can use the Finder app to drag and drop the Ringtone to your iPhone folder.
How to Set Customized Ringtone on an iOS Device
Another way is to download the song as an mp3 using the safari browser on your iOS device, which you can later use to set Ringtone after trimming from the Garage Band. For this:
- Open Garage Band App on your iPhone. It is a pre-installed app for iOS devices, but if you have deleted it, you can Install it again from the Apple store.
- Once you launch the app, head to the audio recorder section by swiping right to left.
- Choose the voice option in this section and then click the third icon from the top right.

- Next, disable the metronome by tapping the button next to the record button.

- Select the Loops icon on the left corner, and go to files> browse songs from files> tap on the audio you saved on your device. (From here, you can also choose a song from your music library)
- Once you select the audio, drag it from the loop section and drop it on the audio screen of the GarageBand app.
- Next, tap on the + button and edit the section length to 30 bars (indicating only 30 seconds of the audio is set as Ringtone).

- Adjust the 30-bar length to the desired part of the audio. And hit play on the tip panel to hear the final part of the audio.

- Once you’re satisfied with your editing, tap on the downward triangle icon on the top left corner and rename the audio with the custom name to be set as Ringtone.
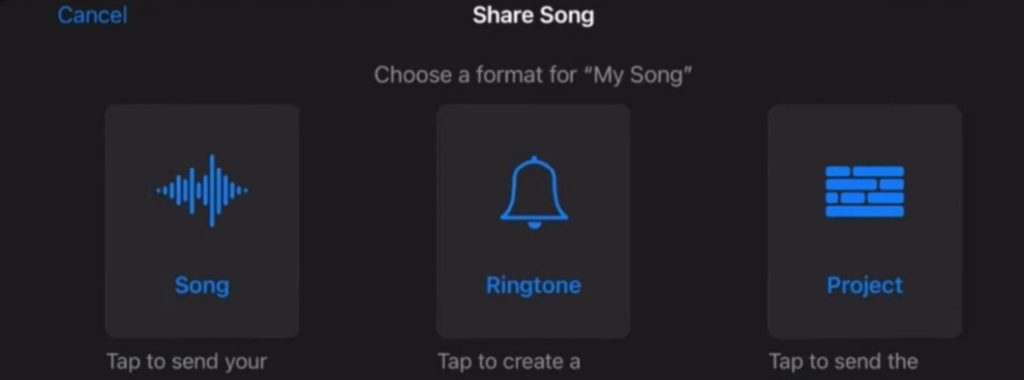
- Finally, long press the project and select share. You will then see a screen to share the song, where you need to select Ringtone. Press on continue and let the audio export to the ringtone folder. (You can rename it before exporting in case GarageBand glitched in renaming.

- You will get a notification when the audio is created successfully by a pop-up, and you can use it as a custom ringtone by clicking on the use sound as an option. And in case you close the pop-up, you can simply go to settings> sounds and haptics> Ringtone and select the audio from there.
Related Posts:
- Best Ringtone Maker – How to Create Ringtones on Android
- Top 5 SHAREit File Transfer Alternative Apps For Android (Free)
- YouTube to MP3 – How to Convert? (Guide 2023)
Conclusion
Your set ringtone says a lot about your personality. Thus, the limited option available in the default list of your phone may not always feel right for your mood. Setting new ringtones on their devices can work as a creative outlet for many people, and this is why this trivial process seems so amusing to us. Luckily, the options for ringtones are abundant today, enabling Android and iOS users to set their Ringtones as they may.

