
Taking a screenshot on iPhone is a quick and easy way to capture whatever is currently displayed on your screen. Whether it’s a conversation in iMessage, a map with directions, or a photo you want to save, a screenshot allows you to save it for later use. In this guide, we will walk you through the steps on how to take a screenshot on iPhone. We shall see how to take a screenshot on iPhone in different models since some high-end models do not have the home button.
How to Take a Screenshot on iPhone 5(s), iPhone 6(s), iPhone 7/7 Plus and iPhone 8/8 Plus Devices
Launched prior to iPhone X and other high end models iPhone 5s, iPhone 6s, iPhone 7/7 Plus and iPhone 8/8 Plus are few of the most successful models of iPhones. The models saw great success worldwide and helped apple establish a brand image in the market. Here is how you can take a screenshot on iPhone with a home button.
How to Take a Screenshot Using Physical Buttons:
- Locate the Home button and the Power button (also known as the Sleep/Wake button) on the side or top of your iPhone 5(s), iPhone 6(s), iPhone 7/7 Plus, or iPhone 8/8 Plus.
- Press and hold the Home button and the Power button simultaneously.
- You will see the screen flash, and you’ll hear a camera shutter sound, indicating that a screenshot has been taken.
- The screenshot will be automatically saved to your device’s Photos app.
Use AssistiveTouch to Take Screenshots:
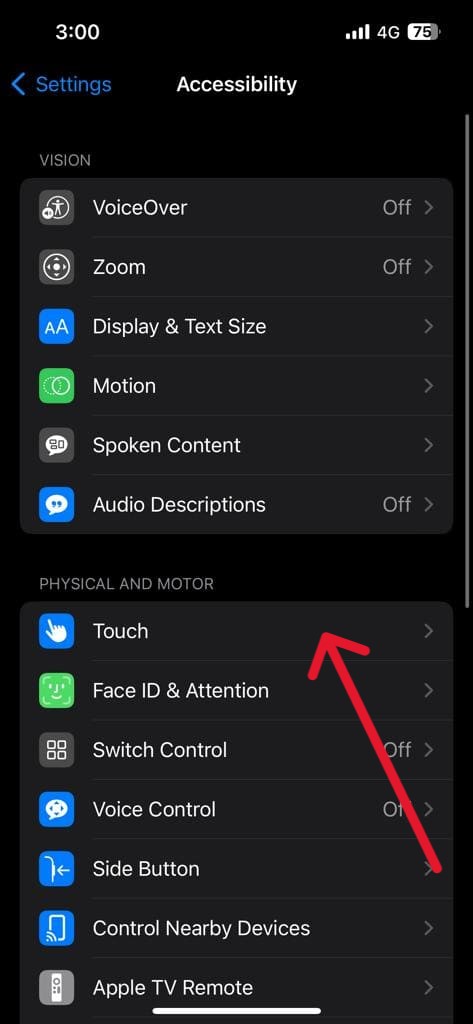
- Go to Settings and then head to Accessibility.

- Then you need to head to Touch from the “Accessibility menu“.
- In the accessibility menu, you will be able to find AssistiveTouch, toggle it on.
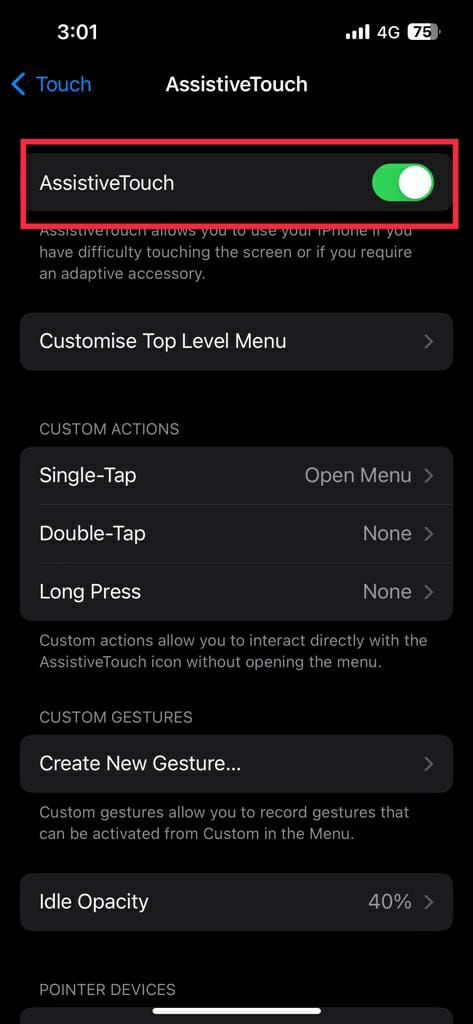
- Once AssistiveTouch is on, a small button will appear on the screen.
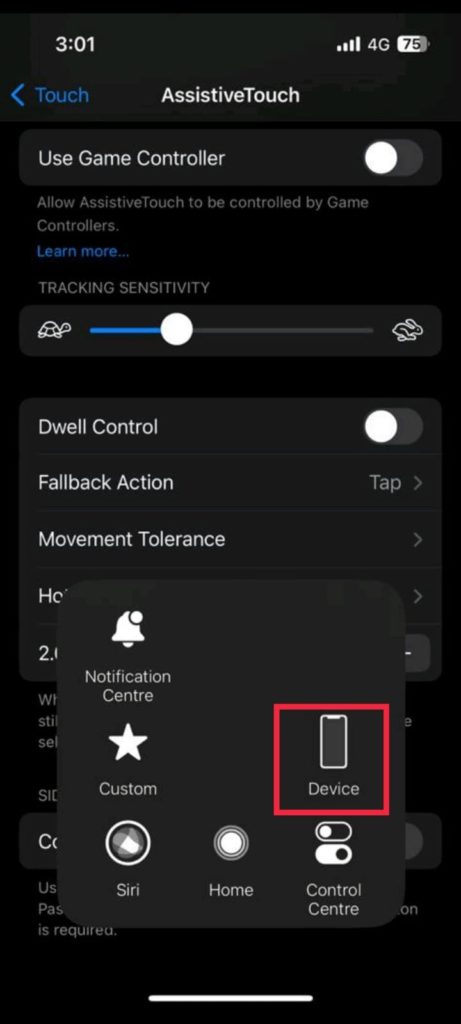
- Tap the AssistiveTouch button, then tap “Device”
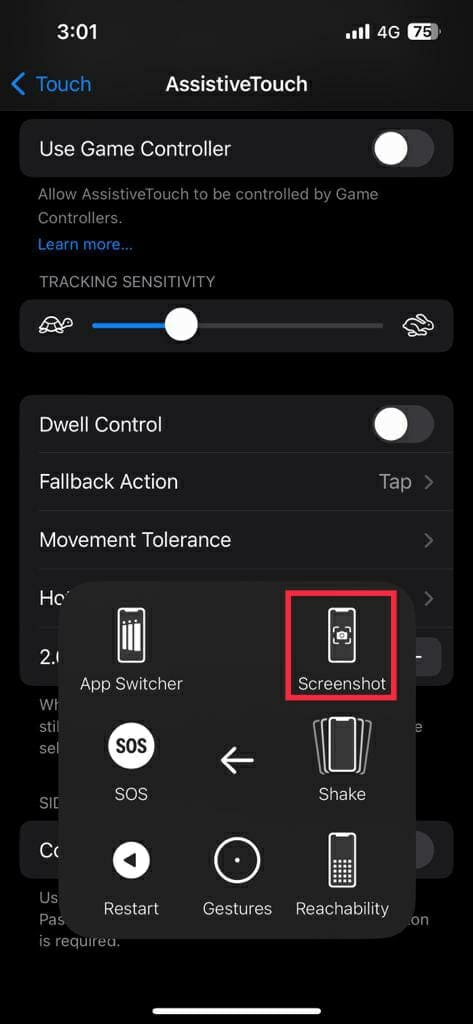
- Now select “More“.
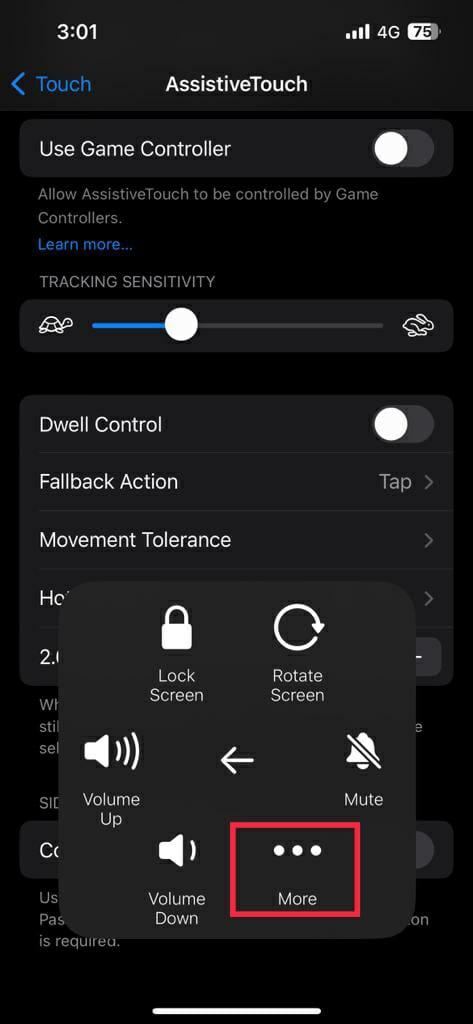
- Tap “Screenshot” to take a screenshot.
Editing and Sharing:
- Once you’ve taken a screenshot, it will automatically be saved in your Photos app.
- Open the Photos app and locate the screenshot.
- Edit, share, or delete the screenshot as needed.
- You can also take advantage of the built-in editing tools in the Photos app such as cropping and adding text to your screenshots before you save or share them.
How to Take a Screenshot on iPhone X/XR/XS/11/12 Devices
Taking a screenshot on the iPhone X/XR/XS/11/12 is slightly different than on previous iPhone models, as these devices do not have a home button. There are several methods that you can to take a screenshot on iPhone X, iPhone XS and iPhone XR.
How to Take a Screenshot Using Physical Buttons on High-end iPhones:
- Locate the Side button (power button) and the Volume Up button on the right side of your iPhone X, iPhone XS, or iPhone XR.
- Press and hold the Side button and the Volume Up button simultaneously.
- You will see the screen flash, and you’ll hear a camera shutter sound, indicating that a screenshot has been taken.
- Doing so will automatically save the screenshot to the photos app.
You can use the AssistiveTouch option also just like we have used above.
Use Siri to take screenshots:
- Press and hold the Side button to activate Siri.
- Say “Take a screenshot” to Siri.
Editing and Sharing:
- Once done, you should be able to find the screenshot in the photos app.
- Open the Photos app and locate the screenshot.
- Edit, share, or delete the screenshot as needed.
- On iPhone XR and later models, you can also take advantage of a feature called “Markup,” which allows you to add text, shapes, and other elements to your screenshots before you save or share them.
- To access this feature, tap on the screenshot in the Photos app and then tap the markup icon (a pencil and ruler).
How to Take a Screenshot on an iPhone Using Apple Pencil?
Taking a screenshot using an Apple Pencil is a great way to capture important information or share what’s on your screen with others. Here is a step-by-step guide on how to take a screenshot using an Apple Pencil on your iPhone:
Prerequisites:
- Your iPhone must support Apple Pencil.
- Ensure that you have paired your apple pencil with your iPhone.
Follow these steps to take a screenshot on iPhone using the apple pencil:
- Locate your Apple Pencil Make sure your Apple Pencil is nearby and ensure that the apple pencil has enough charge.
- Open the content you want to capture Navigate to the screen or app that you want to capture in your screenshot.
- Tap the back of your Apple Pencil on the screen With your Apple Pencil hovering over the screen, tap the back of the pencil on the display. You will hear a camera shutter sound and the screen will briefly flash white, indicating that the screenshot has been captured.
- Once done, you should be able to locate the screenshot in the photos app. Head to Camera Roll or the Screenshots album.
Note: If you are using the Apple Pencil 2nd gen the process is the same but you don’t need to tap the back of the pencil on the screen, you just need to swipe from the bottom left corner towards the center of the screen.
Also Check:
- How to Take A Screenshot on Android
- How to Take Screenshot From YouTube Video
- How to Screenshot On Mac (Take a Screenshot On Mac)
Conclusion
Taking a screenshot on iPhone is a simple and convenient way to capture and share what’s on your screen. We have seen methods that use in-built methods that are super easy to use. Additionally, there are also third-party apps that allow you to take screenshots with added features and customization options. As we come to an end to this article, we hope that you now know several methods to take screenshots on iPhone