Assistive Touch in iPhone is a wonderful feature to elevate the user experience to the next level. This is especially beneficial to users with motor skill impairment as it helps them to perform functions with minimal movement.
One can use Assistive Touch on iPhone to transfer many swiping methods into one-tap away system. Furthermore, helping those who have broken their device’s home screen and volume button. All the other advanced features, like a camera or clicking screenshots, can be accessed with one tap. All you have to do is learn how to enable Assistive Touch in your iPhone from here.
How to Turn On Assistive Touch in iPhone
- First, go to your Settings.
- Next, go to Accessibility.
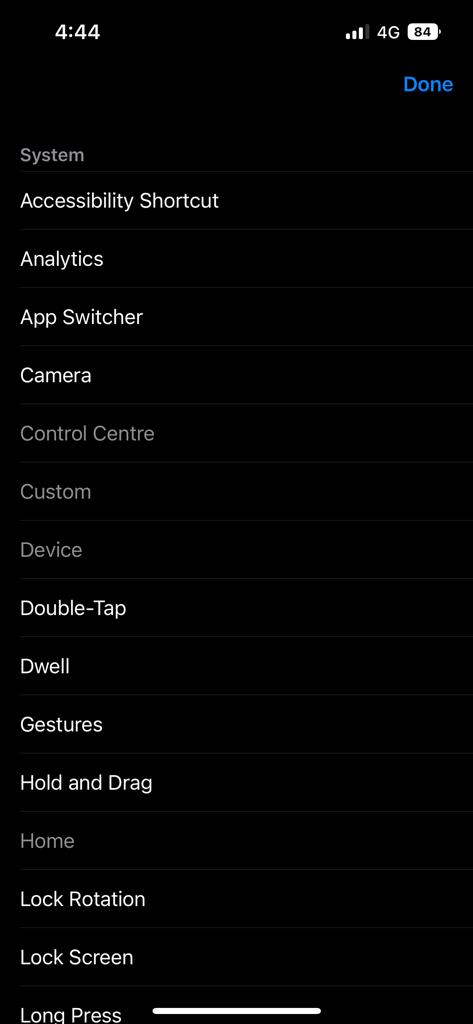
- Scroll to find and select Touch.
- Kindly tap on the Assistive Touch to lead to its settings.
- Lastly, on the next screen, turn the toggle on Assistive Touch.
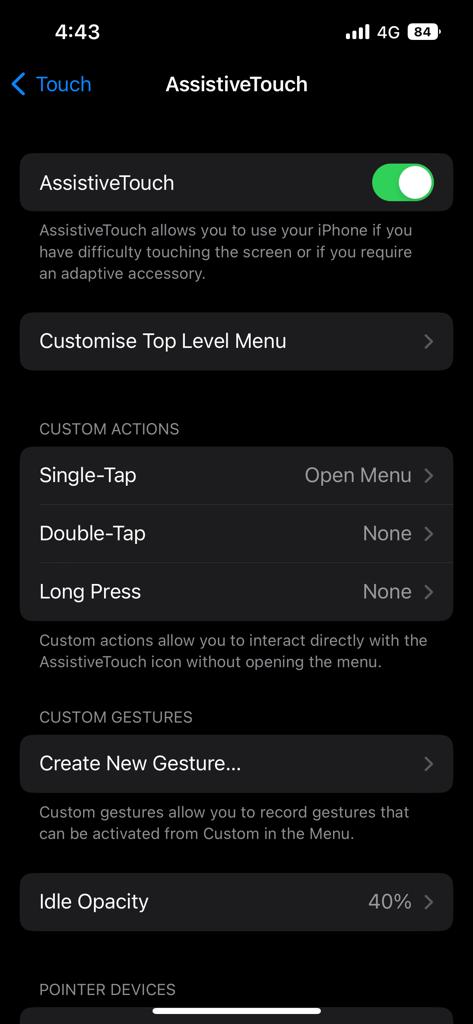
When you turn on the Assistive Touch, a grey circle will appear on the corner of your iPhone’s display. This will be the shortcut to your Assistive Touch menu, and it will be there constantly until you turn off the toggle on Assistive Touch from settings.
You can click on it to open the Assistive Touch menu or drag it across the screen and place it wherever it doesn’t block the screen. Also, you can change how translucent the button is on the screen by changing its percentage of idle opacity in Assistive Touch settings.
How to Use Assistive Touch in iPhone
- Tap on the Assistive Touch shortcut button.
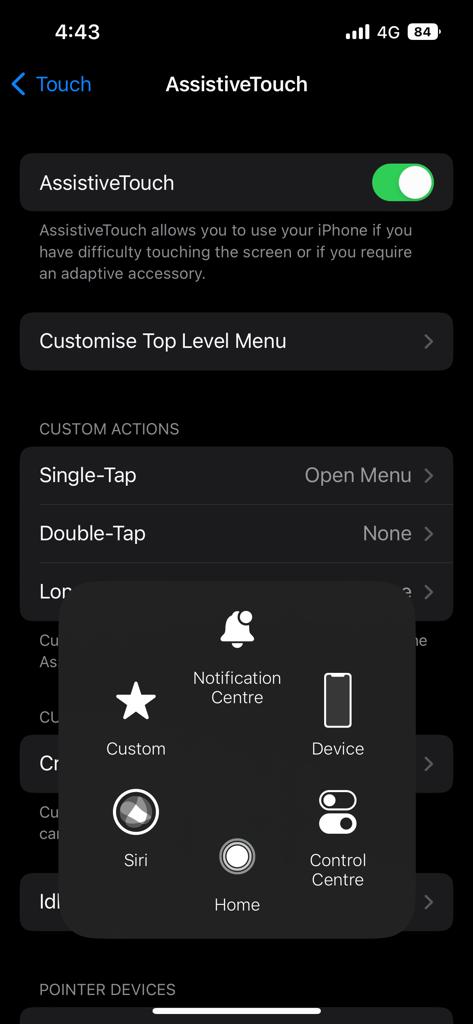
- Then, choose the options available on the menu. By default, you will see these buttons on the Assistive Touch menu.
- Device: Allows you to perform functions like changing the volume, locking the screen, muting, rotating the display, etc.
- Notifications: This shortcut to notification will help you see all your alerts without swiping the screen from top to bottom to open the notification panel.
- Siri: There will be a shortcut to activate Siri.
- Home: Shortcut to go to the home screen.
- Control Centre: You can open the control centre from here without swiping at the bottom.
- Custom: This enables you to customize gestures in Assistive Touch.
How to Customise Assistive Touch Menu
- Go to the Settings App.
- Scroll and select Accessibility.
- Next, tap on Touch.
- Choose Assistive Touch, and here tap on the customize top-level menu.
- You can Add or Delete any default button of the Assistive Touch menu you saw before.
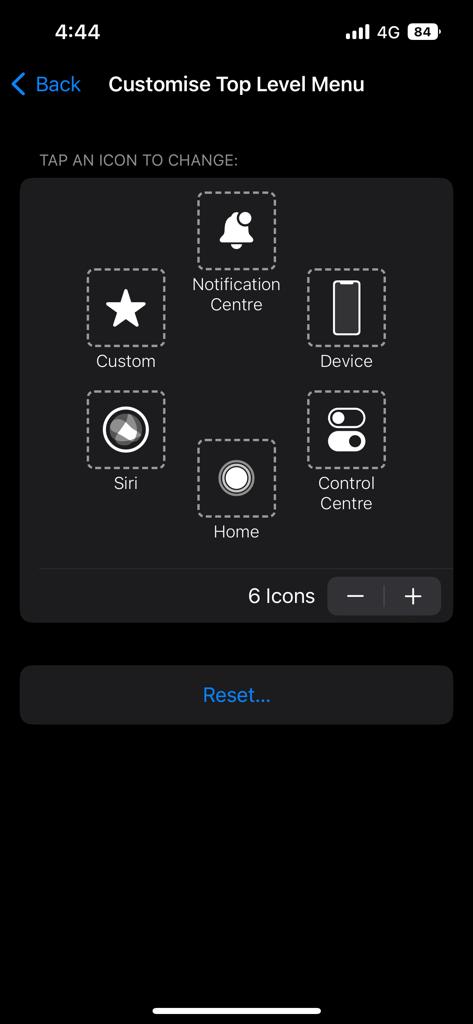
To Add a Button
- Tap on the + icon present at the right corner of the screen. This will add a big + button in the position of the seventh shortcut icon. Select it to add a new shortcut.
- Now, select from the options which shortcut button you need in your Assistive touch menu; for instance, you can add a shortcut to the screenshot and make the default six-button menu into a seven-button menu.
- Once you select, tap to confirm, and you will get the new shortcut button in your Assistive Touch menu.
To Delete a Button
- To delete any existing button from the Assistive Touch in iPhone, select the – icon in the customize Assistive touch section.
- You can’t manually choose the button you’d like to remove from the menu; instead, the system selects the one closest to the (-) button. If the wrong button is deleted, you can add it later using the steps mentioned above.
- You can also select the Reset button at the bottom to re-arrange the buttons as they were in the default settings of the Assistive Touch menu.
- Lastly, Tap Done once you finish customizing the Assistive Touch in your iPhone.
- How to View Web Page Source Code on Android & iPhone
- How to Setup Google Assistant on iPhone
- How to Record WhatsApp Call on Android and iPhone
Conclusion
This is how you can also access and customize Assistive Touch on your iPhone in a minute. Now, your user interface will become even more manageable, and you can perform any function of your phone with just a few taps. We hope you found this guide informative.