Format a Drive in FAT32: FAT32 is a file system that came into existence decades ago, that is, way before Windows 10 was launched.
So, some might argue that Windows 10 users shouldn’t be using the FAT32 file system. However, there are many reasons one might want to use FAT32.
FAT32 is ideal because of its portability, that is, all major operating systems like Windows, Linux, MAC, and even Android, iOS support it.
However, FAT32 has some limitations. It is slower than other file systems like NTFS and exFAT.
We cannot use the FAT32 file system to format drives greater than 16 TB and files greater than 4 GB. Through this article, we shall discuss the various ways through which we can format a drive in FAT32 in Windows 10.
Format a Drive in FAT32 in Windows 10 using Powershell
- Connect the device that you want to format in FAT32 to your laptop/desktop.
- Make note of the letter that denotes this drive. You can find it on “My PC”.
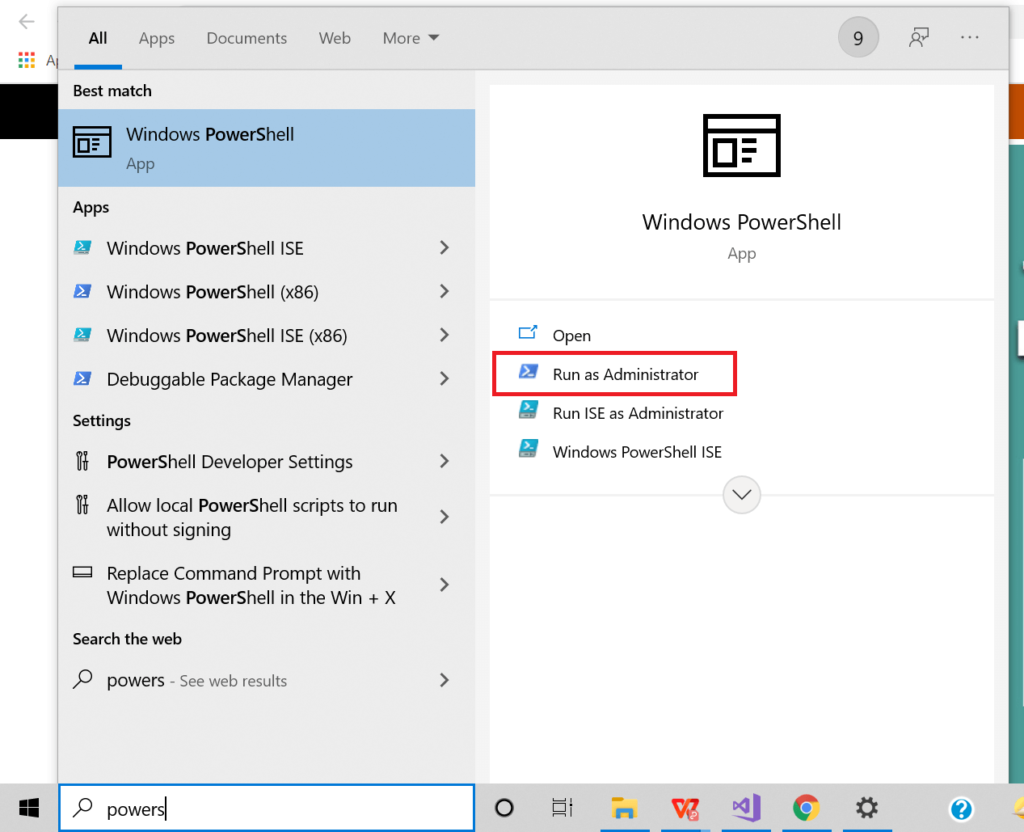
- Go to Start on your laptop/desktop.
- Search for PowerShell.
- Make sure to open Powershell using the “Run as Administrator” option OR you can use the Windows + R shortcut key to open Run and type PowerShell there.

- In the Powershell prompt, type the following command -> format /FS:FAT32 X: (where X is replaced by the alphabet that denotes the drive you want to format in FAT32)
NOTE:
- Back up all the data in the drive as formatting will lead to loss of all the data.
- This method can take long hours to successfully complete the formatting. So, make sure to schedule the process at a time according to your convenience.
Format a Drive in FAT32 in Windows 10 using File Explorer
- Go to Start on your laptop/desktop.
- Search for “My PC” and go to My PC.
- Right-click on the USB drive.
- Click on the option “Format”.
- In the box that pops up, click on the Start button.
- Click on OK to confirm the formatting of the drive.
Format a Drive in FAT32 in Windows 10 using Third-Party Apps
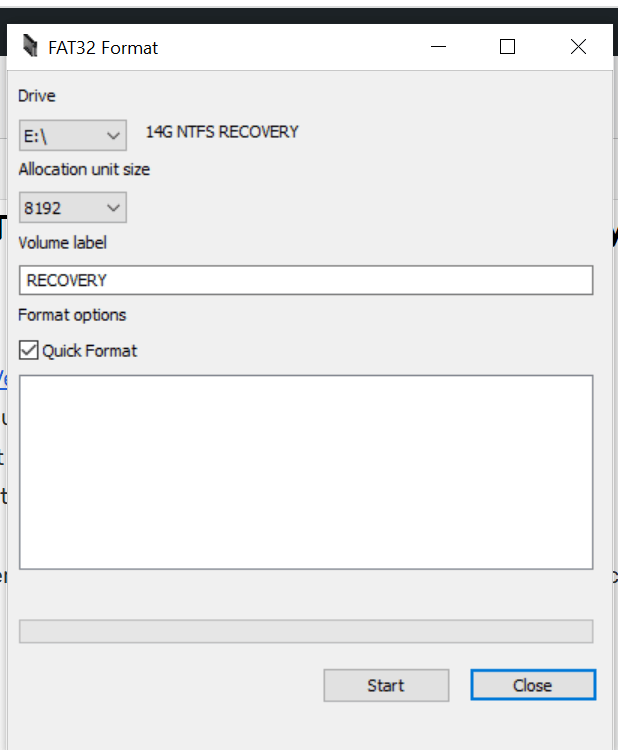
- Download the Windows GUI Version of FAT32 format by Ridgecrop Consultants Ltd.
- Open the guiformat.exe executable file that you have just downloaded.
- In the FAT32 Format box that pops up, select the drive that you want to format.
- Select the “Quick Format” option if it is not check-marked by default.

- Click on the Start button.
- A window confirming whether you want to format the drive will come up. Click on OK to confirm.
NOTE: This method is the quickest of all the methods mentioned in this article. Therefore, if you want to format a 16 GB and above drive, then this should be your go-to option.
Want to learn how to choose the perfect PC? The one that is catered to your needs and is super affordable? Read this article to find out how you can do it.
- How to Free Up Storage Space On iPhone
- How to Fix Insufficient Storage Error (Android & iOS)
- Free Up Storage on any Android using Google Photos
Conclusion
Formatting a drive in FAT32 in Windows 10 can be time-consuming, especially if the size of the drive is quite large.
This article provides alternatives for both quick formatting as well as normal formatting. We hope these methods work for you.
Do you know any other third-party applications that we can use to format a drive in FAT32 in Windows 10? Let us know in the comments!

